Monday, September 9, 2019

Preserve Your Petals

Before Summer comes to an end and flowers fade, preserve your petals with this easy project.

Grab a few flowers from your garden & place the petals between two pieces of parchment paper. I used petals from knock out roses and hydrangeas. Cover the parchment paper with a towel and use a hot iron to flatten out the petals.

 Working in small sections, add a generous amount of ModPodge to a battery operated candle.
 Place petals on the candle then cover with another coat of ModPodge.
 You can cover the entire candle, but I chose to cover only half of the candle.
 And, of course, everything looks better in threes!

 They're pretty when lit, too!
What is your favorite Summer flower? Will you preserve it?


Linking To:

Monday, September 2, 2019

Hope For The Chest

This hope chest was minutes away from going on a burn pile!

A friend called to tell me that he had a few things I might be interested in, but the fire was lit and if I wanted anything I'd have to come right over. Luckily I was able to get there in time to rescue a few things. 

This hope chest was missing the skirt around the bottom that forms the legs. 
 It was also missing the knobs on the faux drawers.
I gave the chest a fresh coat of paint using Dixie Belle's color Caviar.

 Rather than put new knobs on, I used re*design with Prima molds & modeling material to create medallions to cover the holes.
 I painted the medallions with Dixie Belle's Moonshine Metallics using the color, Gold Digger. Then I glued them over the holes using E6000.
 I also painted some small legs that I found at Lowe's using the Gold Digger.
 What a shame it would have been if this chest had gone up in flames!


The lesson...
Call before you burn!
There are plenty of us out there that love to rescue & revive discarded furniture.

Linking To:

Tuesday, July 30, 2019

Copper Patina Pill Bottles

I hate throwing away medication bottles. Every time that I do, I think about how I should find a use for them.
I finally removed the labels from a few and decided I could use Dixie Belle's Patina Collection to make them pretty enough to use as bud vases.

I first gave the bottles a coat of Dixie Belle Paint, which works like a primer for the patina paint. The paint color didn't matter because it was going to be covered by the patina paint. 
Then I gave the bottles a coat of Copper Patina Paint and let it dry. 
Once dry, I gave the bottles a second coat of the copper paint. While the paint was still wet, I sprayed the bottles with the Green Patina Spray.

 The metal particles in the patina paint will begin to react with the patina spray immediately. 
I used E6000 glue to adhere jute around the rim of the bottles.

 They're the perfect size for small flowers.
 And, they look much better here than in the landfill!


Linking To:

Monday, July 15, 2019

To Market We Will Go

We are fortunate to have farmers markets available to us year round here in Fayette County. There’s not much better than fresh produce, locally made cheese, & fresh baked bread.
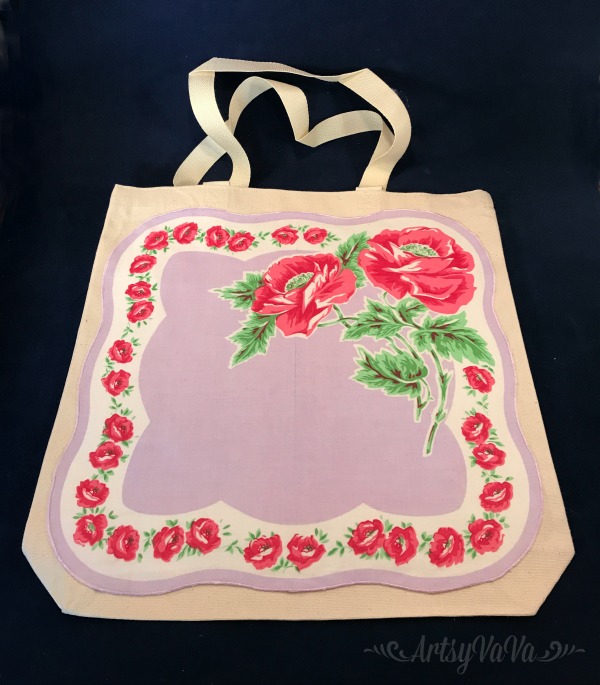
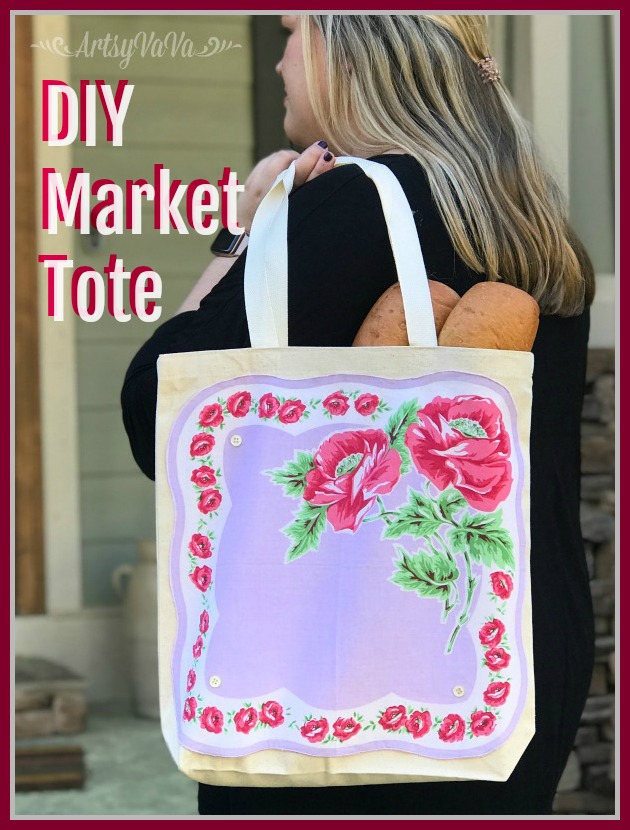
Rather than have your goodies put in a plastic bag that's just going to end up in the landfill, take along a reusable bag. And, with this DIY market tote, you'll be the most stylish shopper at the market.
Supplies:

Canvas Tote
Vintage Handkerchief
Hem Tape
Iron
Buttons
E6000 Glue
 What makes this project so easy is that you don't have to sew! 

Position a handkerchief onto the tote. Place hem tape under the edges of the handkerchief. If the handkerchief has curved edges, you may need to tear off smaller pieces of the hem tape to arrange them around the sections that aren’t straight.


 Using the cotton setting, use the iron to adhere the handkerchief to the tote. 


You can stop there, but why not make it even prettier by adding some buttons. You can sew them on, but I used E6000 to glue them on. 

 You may want to stock up on totes and hankies because you're going to want to make more!!! 
 They also make great gifts!


Linking To:
Ginger Snap Crafts,  Rae Gun Ramblings, Chic On a Shoestring,  Simply Sweet Home, Have A Daily Cup Of Mrs Olson, The Cottage Market,  Funky Junk Interiors, DIY Showoff, Craft-O-Maniac, Keeping It Simple, I Should Be Mopping The Floor, The Dedicated House,  Sugar Bee Crafts, Flour Me With Love,  Today's Creative Blog, Tip Junkie,   I Gotta Create,   Domestically Speaking,  The Answer Is Chocolate, Skip To My Lou, The Thrifty Home, Flutter Buster, Nap Time Creations, The Foley Fam,  Finding Silver Pennies, A Stroll Thru Life, French Country Cottage,  Knick Of Time, Lou Lou Girls, Our Hopeful Home, My Thrift Store Addiction, The Painted Hinge, Savvy Southern Style,  Yesterday On Tuesday, Confessions Of A Plate Addict, My Uncommon Slice Of Suburbia, Dabbling And Decorating


Tuesday, July 2, 2019

Red, White, & Bloom

Memorial Day, 4th Of July, Labor Day...
Summer is filled with patriotic holidays in the US. And, I love decorating with red, white, & blue. I leave my patriotic decor up from May through September, then I go right to my other love...Fall decor!

And, of course, being artsy/crafty, much of my decor is homemade.
This is a fun craft project to do with the kids. It's easy & inexpensive.
I used paint from the Dixie Belle Paint Company in the colors, Bunker Hill Blue, Honky Tonk Red, & Cotton. Acrylic paint will work too.
You'll also need a glass container with flat sides, craft sticks that are taller than the container, star stickers, a rubber band, a string, & E6000 glue.
 Wrap a string around the glass container to measure the circumference. Place craft sticks side by side & use the string the determine how many sticks you need to wrap around the container.

Paint some of the sticks white to represent the white stripes of the flag. Also, paint sticks white that will become the blue section of the flag.
 Place the star stickers on the white sticks that will become blue.

 Use the blue to paint over the sticks with the stars. When dry, peel up the stickers to reveal the white stars.

 Paint the remaining sticks red.
 Place a rubber band around the glass container. Apply E6000 to the back of the craft sticks, then insert them between the glass & the rubber band. 
 Leave the rubber band to hold the craft sticks in place until the glue has dried completely.

 Once the glue has dried, remove the rubber band and your vase is ready to fill with water & your favorite flowers.


Linking To:
Ginger Snap Crafts,  Rae Gun Ramblings, Chic On a Shoestring,  Simply Sweet Home, Have A Daily Cup Of Mrs Olson, The Cottage Market,  Funky Junk Interiors, DIY Showoff, Craft-O-Maniac, Keeping It Simple, I Should Be Mopping The Floor, The Dedicated House,  Sugar Bee Crafts, Flour Me With Love,  Today's Creative Blog, Tip Junkie,   I Gotta Create,   Domestically Speaking,  The Answer Is Chocolate, Skip To My Lou, The Thrifty Home, Flutter Buster, Nap Time Creations, The Foley Fam,  Finding Silver Pennies, A Stroll Thru Life, French Country Cottage,  Knick Of Time, Lou Lou Girls, Our Hopeful Home, My Thrift Store Addiction, The Painted Hinge, Savvy Southern Style,  Yesterday On Tuesday, Confessions Of A Plate Addict, My Uncommon Slice Of Suburbia, Dabbling And Decorating


Related Posts Plugin for WordPress, Blogger...