Showing posts with label ModPodge. Show all posts

Friday, April 17, 2020

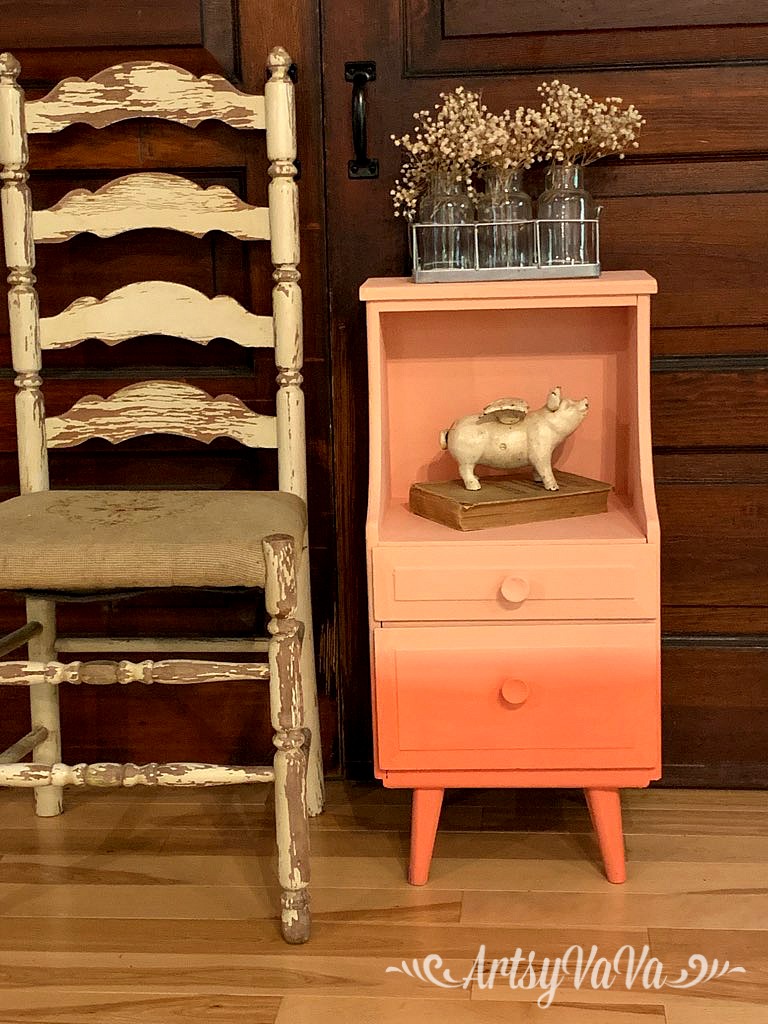
Creamsicle With A Surprise Inside

When I found this little table at a yard sale, I loved the style but it was in terrible shape...

 It was so bad that I had to get out the electric sander. It had been spray painted so the finish was very uneven & had lots of drips.
I chose the color, Apricot, from the Dixie Belle Paint Company & once I started painting, I ran into another problem. The tannins in the wood began to bleed through the paint in some areas.
So, I added 2 coats of Dixie Belle's BOSS. This blocked the bleed through.
 Once the table was painted with Apricot, I added Flamingo...


The drawers needed some love too! So, I painted them with the color Stormy Seas...
I added a succulent pattern to the sides of the drawers using decoupage tissue paper from re*design with Prima.


 This cute table sold before I ever painted it. The buyer saw the "before" on Instagram & said they didn't care what color I painted it, they just wanted it to be happy.
 And, I have to give the new owner credit for the title. When she saw the finished product she said it reminded her of a creamsicle.
 Luckily, she likes creamsicles...
& the table!


Linking To:

Thursday, March 12, 2020

Cottontail Candy. Co


We've had some dreary, wet weather here in Georgia over the last couple of months. So, it's time to add some cheerful, colorful, Easter decor to my house in anticipation of Spring!

I made this fun sign using a wooden cutout from Signopoly. It came with one piece with the shape of a bunny cut out in the center, & a solid piece for the back.

 I cut a pretty piece of wrapping paper & glued it to the back board using ModPodge. 

 I painted the wood with the bunny with the color, Daisy, from the Dixie Belle Paint Company.

 I placed the painted board over the back board & attached them with a staple gun.
 I made a vinyl stencil for the lettering with my Cricut Maker. I used the color, Evergreen, for the words.
 This cheerful sign adds a little bit of sunshine to these rainy days! 


Linking To:

Monday, November 11, 2019

DIY Thankful Sign

It's November, the month of Thanksgiving.
This DIY Thankful Sign is the perfect addition to your Fall decor.
And, it's super easy!

I used my Cricut Maker to cut out the word, thankful, in vinyl. If you don't have a Cricut you can buy vinyl letters at craft & office supply stores.
I added the vinyl to a wood sign board from Michael's.
 To help prevent the paint from seeping under the vinyl, I painted over it with the sealer Gator Hide from The Dixie Belle Paint Company. This creates a barrier over the edge of the vinyl so you will get crisp, perfect letters when you peel up the vinyl.
 Once the Gator Hide was dry, I used a makeup sponge to pounce over the vinyl using the Dixie Belle paint color, Fluff. Using a makeup sponge also helps prevent the paint from bleeding under the vinyl.
 I used a brush to paint the rest of the board.
 Once I had painted two coats of Fluff, I pulled off the vinyl.

 I added Mod Podge to a corner section of the board...
 then I placed a napkin with pretty pumpkins over the wet ModPodge. The pumpkins are perfect for Fall, but you could use other napkins to keep the sign up year round. The layers of the napkin need to be separated or the paper won't stick properly.
 I tore off the extra napkin that came over the edge of the board and added more ModPodge on top of the napkin.
 I glued a mini clothespin to the opposite corner of the board.
 I added a family photo from my recent trip to Italy.
 The clothespin makes it easy to change out the photo.

Happy Thanksgiving!


Linking To:

Monday, September 9, 2019

Preserve Your Petals

Before Summer comes to an end and flowers fade, preserve your petals with this easy project.

Grab a few flowers from your garden & place the petals between two pieces of parchment paper. I used petals from knock out roses and hydrangeas. Cover the parchment paper with a towel and use a hot iron to flatten out the petals.

 Working in small sections, add a generous amount of ModPodge to a battery operated candle.
 Place petals on the candle then cover with another coat of ModPodge.
 You can cover the entire candle, but I chose to cover only half of the candle.
 And, of course, everything looks better in threes!

 They're pretty when lit, too!
What is your favorite Summer flower? Will you preserve it?


Linking To:
Related Posts Plugin for WordPress, Blogger...