Saturday, March 31, 2018

Succulent Table

I know a lot of people in the junkin/antique business and we often buy from each other. A couple of years ago I bought a few furniture pieces from a fellow junker and she threw in this table for free...
It was missing its top and the doors. It was also missing a piece of molding on the front of the drawer. I tried to remove the rest of the molding to no avail. So, I decided to embrace it...I'm not perfect either!

I painted the table with a bold yellow called Colonel Mustard.


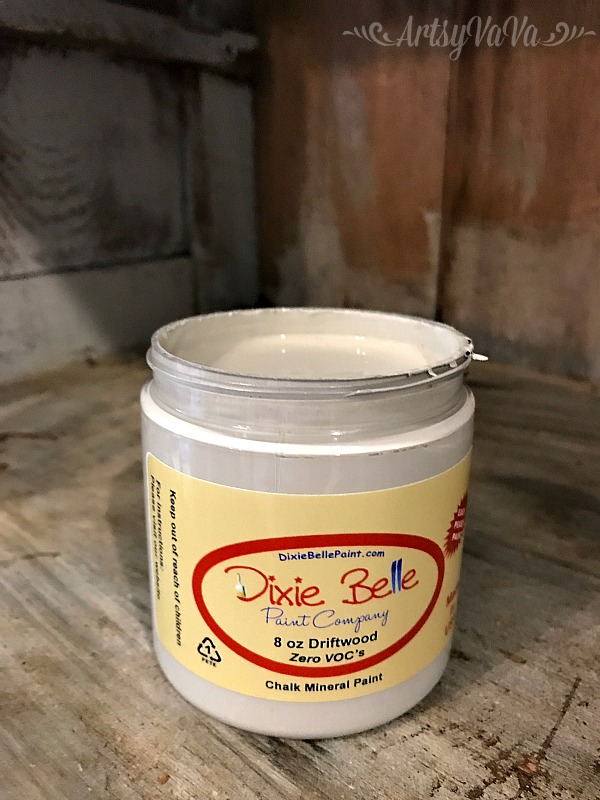
I love gray & yellow together, so I painted the inside of the table with a light gray called, Driftwood.

The Dixie Belle Paint Company has a beautiful new gray wax called, Grunge Gray, and I'm in love!

I added the wax to the table with a wax brush, then wiped it down with a rag.


I filled the drawer with heavy duty plastic and stapled it down.

Then I trimmed the excess plastic.

I added pallet wood to cover the staples and give the top a finished look.

I added a layer of pebbles for drainage.

I filled the drawer with dirt then planted succulents.


I always knew I wanted to make this freebie some type of planter. And, even though it sat undone for a couple of years, I think it was worth the wait!

Linking To:
Coastal CharmGinger Snap CraftsCreations By KaraRae Gun RamblingsMade In A DayChic On a ShoestringSimply Sweet Home, The Shabby Nest Somewhat Simple,   Live Laugh Rowe, Have A Daily Cup Of Mrs OlsonThe Cottage Market,  Funky Junk InteriorsDIY Showoff, Craft-O-Maniac, Keeping It Simple, I Should Be Mopping The Floor, The Dedicated House Coastal Charm, Reasons To Skip The Housework, Sugar Bee Crafts,  Nifty Thrifty Things, Cherished BlissMad In Crafts, Flour Me With Love, Not Just A HousewifeToday's Creative Blog, Tip Junkie Homework,  I Gotta Create,   Domestically Speaking,  The Answer Is Chocolate, Skip To My LouThe Thrifty Home,Cedar Hill RanchFlutter BusterNap Time Creations, Hope In Every Season, The Foley FamOur Home Away From Home,  RemodelaholicFlamingo ToesVMG206 Finding Silver PenniesA Stroll Thru Life, French Country CottageThe Scoop, Stone Gable, Knick Of Time, Lou Lou GirlsOur Hopeful Home, The Painted Hinge, Savvy Southern Style, Tattertots & Jello, Yesterday On Tuesday, Rachel Teodoro, Worthing Court, Confessions Of A Plate Addict


Saturday, March 24, 2018

China Cabinet Makeover With Caviar

 At first glance, this china cabinet looks like it didn't need a makeover.
 But, on further inspection, it had some major issues. The veneer on one side was in terrible shape. I removed the veneer then used Swamp Mud from the Dixie Belle Paint Company to patch any bad areas. I sanded the Swamp Mud smooth after I let it dry overnight. Then it was time to paint!
I used the color, Caviar, by Dixie Belle to paint the china cabinet. On the front panels, I did a blending effect with the colors Caviar, Manatee, & Fluff.
I waxed the panels with Clear Wax then I added Black Wax to soften the look a little more. I used a wax brush to apply the wax, then used a rag to smooth it out.
I changed the knob to this beautiful one from Hobby Lobby. 
I also added an Iron Orchid Design image transfer to the glass.
The IOD transfers are so easy. Just rub onto your surface with the tool provided in the package, then peel up the plastic backing.

Anybody else love Caviar?


This post contains affiliate links. If you order Dixie Belle Paint Company products, I may make a little money but at no extra cost to you.


Linking To:
Coastal CharmGinger Snap CraftsCreations By KaraRae Gun RamblingsMade In A DayChic On a ShoestringSimply Sweet Home, The Shabby Nest Somewhat Simple,   Live Laugh Rowe, Have A Daily Cup Of Mrs OlsonThe Cottage Market,  Funky Junk InteriorsDIY Showoff, Craft-O-Maniac, Keeping It Simple, I Should Be Mopping The Floor, The Dedicated House Coastal Charm, Reasons To Skip The Housework, Sugar Bee Crafts,  Nifty Thrifty Things, Cherished BlissMad In Crafts, Flour Me With Love, Not Just A HousewifeToday's Creative Blog, Tip Junkie Homework,  I Gotta Create,   Domestically Speaking,  The Answer Is Chocolate, Skip To My LouThe Thrifty Home,Cedar Hill RanchFlutter BusterNap Time Creations, Hope In Every Season, The Foley FamOur Home Away From Home,  RemodelaholicFlamingo ToesVMG206 Finding Silver PenniesA Stroll Thru Life, French Country CottageThe Scoop, Stone Gable, Knick Of Time, Lou Lou GirlsOur Hopeful Home, The Painted Hinge, Savvy Southern Style, Tattertots & Jello, Yesterday On Tuesday, Rachel Teodoro, Worthing Court, Confessions Of A Plate Addict


Saturday, March 17, 2018

For The Birds

Spring is here, and birds will be busy building their nests. Give them a helping hand by providing things that they can use while nesting. And, while you’re helping out our feathered friends, you’ll also be adding something pretty to your yard.
Supplies:
Wire Whisk
Moss
Burlap or Other Natural Fiber Fabric
Straw
Twigs
Dead Leaves
Loose Wool or Cotton (I ordered wool from www.myfavoritesheep.com)
Twine
Beads
Note: Do not use drier lent because it may contain chemicals that are harmful to birds. Also, refrain from using yarn or string, as they may get tangled around the birds and cause harm.

 Pull apart the wire of the whisk just wide enough to insert the moss.


 Layer the straw, twigs, leaves, fabric strips, and wool over the moss.


Tie a piece of twine to the end of the whisk. Add beads to the twine then tie the whisk around a branch. Wrap excess twine around the branch and tie it to secure.


 Some birds, like Goldfinches, build their nests as late as June, so continue to add elements to the whisk as the birds empty it out.


Linking To:
Coastal CharmGinger Snap CraftsCreations By KaraRae Gun RamblingsMade In A DayChic On a ShoestringSimply Sweet Home, The Shabby Nest Somewhat Simple,   Live Laugh Rowe, Have A Daily Cup Of Mrs OlsonThe Cottage Market,  Funky Junk InteriorsDIY Showoff, Craft-O-Maniac, Keeping It Simple, I Should Be Mopping The Floor, The Dedicated House Coastal Charm, Reasons To Skip The Housework, Sugar Bee Crafts,  Nifty Thrifty Things, Cherished BlissMad In Crafts, Flour Me With Love, Not Just A HousewifeToday's Creative Blog, Tip Junkie Homework,  I Gotta Create,   Domestically Speaking,  The Answer Is Chocolate, Skip To My LouThe Thrifty Home,Cedar Hill RanchFlutter BusterNap Time Creations, Hope In Every Season, The Foley FamOur Home Away From Home,  RemodelaholicFlamingo ToesVMG206 Finding Silver PenniesA Stroll Thru Life, French Country CottageThe Scoop, Stone Gable, Knick Of Time, Lou Lou GirlsOur Hopeful Home, The Painted Hinge, Savvy Southern Style, Tattertots & Jello, Yesterday On Tuesday, Rachel Teodoro, Worthing Court, Confessions Of A Plate Addict


Saturday, March 10, 2018

Easter Bouquet


 Just before Christmas, my friend, Shelly, gave me the sweetest little Christmas bouquet. 
 That pretty bouquet inspired me to make an Easter bouquet.
I picked up these little eggs at Michael's. They were the perfect size, but I wanted different colors and I didn't care for the metallic flecks.
 So, I painted the eggs with Dixie Belle paint using the colors Vintage Duck Egg, Daisy, Apricot, & Limeade.
 I cut wooden skewers in half and inserted them into a hole I made in the eggs using a nail.
 Once the eggs were all on the skewers, I aged them with Van Dyke Glaze.
 I saved the burlap from the Christmas bouquet, fashioned it back into its cone shape, then added twine to hold its shape.
 I stuffed the burlap cone with moss.
 Then I inserted the skewers into the moss.
 I made a banner on the computer, printed it on card stock,  and cut it like the one on the Christmas bouquet.
I find it very fitting that something from Christmas inspired something for Easter.


Linking To:
Coastal CharmGinger Snap CraftsCreations By KaraRae Gun RamblingsMade In A DayChic On a ShoestringSimply Sweet Home, The Shabby Nest Somewhat Simple,   Live Laugh Rowe, Have A Daily Cup Of Mrs OlsonThe Cottage Market,  Funky Junk InteriorsDIY Showoff, Craft-O-Maniac, Keeping It Simple, I Should Be Mopping The Floor, The Dedicated House Coastal Charm, Reasons To Skip The Housework, Sugar Bee Crafts,  Nifty Thrifty Things, Cherished BlissMad In Crafts, Flour Me With Love, Not Just A HousewifeToday's Creative Blog, Tip Junkie Homework,  I Gotta Create,   Domestically Speaking,  The Answer Is Chocolate, Skip To My LouThe Thrifty Home,Cedar Hill RanchFlutter BusterNap Time Creations, Hope In Every Season, The Foley FamOur Home Away From Home,  RemodelaholicFlamingo ToesVMG206 Finding Silver PenniesA Stroll Thru Life, French Country CottageThe Scoop, Stone Gable, Knick Of Time, Lou Lou GirlsOur Hopeful Home, The Painted Hinge, Savvy Southern Style, Tattertots & Jello, Yesterday On Tuesday, Rachel Teodoro, Worthing Court, Confessions Of A Plate Addict


Related Posts Plugin for WordPress, Blogger...