Showing posts with label garden. Show all posts

Monday, September 9, 2019

Preserve Your Petals

Before Summer comes to an end and flowers fade, preserve your petals with this easy project.

Grab a few flowers from your garden & place the petals between two pieces of parchment paper. I used petals from knock out roses and hydrangeas. Cover the parchment paper with a towel and use a hot iron to flatten out the petals.

 Working in small sections, add a generous amount of ModPodge to a battery operated candle.
 Place petals on the candle then cover with another coat of ModPodge.
 You can cover the entire candle, but I chose to cover only half of the candle.
 And, of course, everything looks better in threes!

 They're pretty when lit, too!
What is your favorite Summer flower? Will you preserve it?


Linking To:

Saturday, May 25, 2019

Secret Garden

Got scrap wood? Turn it into art!

There's always a project of some kind going on at my house, so there's also a lot of scrap pieces of wood. It's nice because whenever a project design comes to mind, I usually have what I need to complete it. And, when an idea hits me I get impatient and want to get it done.

For my secret garden art, I started with an 11" x 14" piece of wood and painted it with the color Buttercream from The Dixie Belle Paint Company. 
 I found this pretty wrapping paper at HomeGoods. Do you know how hard it is to find pretty wrapping paper?!!! It was easy to find the wood...not so easy to find wrapping paper!
 I cut the wrapping paper a little larger than the size of the wood.
I used Dixie Belle's Gator Hide as my decoupage medium. I applied a coat of the Gator Hide to the back of the paper and also to the painted wood. You have to work quickly so it doesn't start to dry.
 I placed the paper onto the wood and used a brayer to smooth out any bubbles & wrinkles. 
 For the excess paper along the edges, I tore it off with a downward motion allowing the edge of the wood to help tear the paper. I sanded off any paper that was left behind.
 I painted a metal secret garden plaque with the Buttercream.
 Once the paint dried, I added gilding wax in the color, Anastasia, to the raised areas of the plaque. I screwed the plaque onto the lower part of the wood.
 I painted a wide mouth mason jar with the color Peony, then sanded the raised areas on the jar.
 I screwed on a hose clamp to the wood, put the ring back onto the jar then placed it into the clamp.

 The jar is perfect for holding flowers or a candle. You could even add some pebbles, dirt, & then add plants to the jar. Mine will probably hold paintbrushes at some point.


Do you have a secret garden?


Linking To:
Ginger Snap Crafts,  Rae Gun RamblingsChic On a ShoestringSimply Sweet HomeHave A Daily Cup Of Mrs OlsonThe Cottage Market,  Funky Junk InteriorsDIY Showoff, Craft-O-Maniac, Keeping It Simple, I Should Be Mopping The Floor, The Dedicated HouseSugar Bee CraftsFlour Me With Love,  Today's Creative Blog, Tip Junkie  I Gotta Create,   Domestically Speaking,  The Answer Is Chocolate, Skip To My LouThe Thrifty HomeFlutter BusterNap Time CreationsThe Foley Fam Finding Silver PenniesA Stroll Thru Life, French Country Cottage,  Knick Of Time, Lou Lou GirlsOur Hopeful Home, My Thrift Store AddictionThe Painted Hinge, Savvy Southern Style,  Yesterday On TuesdayConfessions Of A Plate Addict, My Uncommon Slice Of Suburbia, Dabbling And Decorating


Tuesday, March 26, 2019

Clay Plant Markers

Spring is finally here! And that means we'll soon be planting our gardens.
 Herbs are some of the most rewarding plants to grow. They add beauty and fragrance to our garden. And, there’s nothing better than fresh picked herbs to add flavor to our food. 
I've shared some DIY plant markers in the past...

But, these may be the easiest yet to create...

Preheat your oven to 275 degrees. 
Knead Sculpey oven bake clay until it is soft and easy to work with. Roll the clay out to 1/4 inch thickness.
Use cookie cutters to get the shapes you want.
Press metal skewers into the back of the clay.

Place the markers on a cookie sheet covered with wax paper. Press letter beads into the clay to spell out the herbs you'll be planting.
Bake the plant markers in the preheated oven for 15 minutes, leaving the skewers & beads in place. Don't worry... the beads won't melt.
Once baked, the skewers and beads are set firmly in place.


Stick the skewers into the dirt & watch your garden grow.


Linking To:
Ginger Snap CraftsCreations By KaraRae Gun RamblingsChic On a ShoestringSimply Sweet HomeHave A Daily Cup Of Mrs OlsonThe Cottage Market,  Funky Junk InteriorsDIY Showoff, Craft-O-Maniac, Keeping It Simple, I Should Be Mopping The Floor, The Dedicated HouseSugar Bee CraftsFlour Me With Love,  Today's Creative Blog, Tip Junkie Homework,  I Gotta Create,   Domestically Speaking,  The Answer Is Chocolate, Skip To My LouThe Thrifty HomeFlutter BusterNap Time CreationsThe Foley Fam Finding Silver PenniesA Stroll Thru Life, French Country Cottage,  Knick Of Time, Lou Lou GirlsOur Hopeful Home, My Thrift Store AddictionThe Painted Hinge, Savvy Southern Style,  Yesterday On TuesdayConfessions Of A Plate Addict, My Uncommon Slice Of Suburbia, Dabbling And Decorating


Saturday, March 31, 2018

Succulent Table

I know a lot of people in the junkin/antique business and we often buy from each other. A couple of years ago I bought a few furniture pieces from a fellow junker and she threw in this table for free...
It was missing its top and the doors. It was also missing a piece of molding on the front of the drawer. I tried to remove the rest of the molding to no avail. So, I decided to embrace it...I'm not perfect either!

I painted the table with a bold yellow called Colonel Mustard.


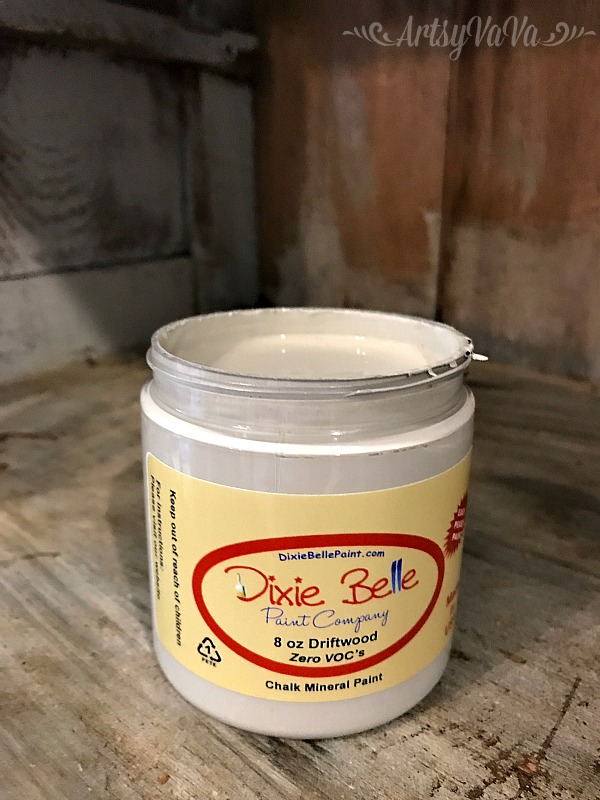
I love gray & yellow together, so I painted the inside of the table with a light gray called, Driftwood.

The Dixie Belle Paint Company has a beautiful new gray wax called, Grunge Gray, and I'm in love!

I added the wax to the table with a wax brush, then wiped it down with a rag.


I filled the drawer with heavy duty plastic and stapled it down.

Then I trimmed the excess plastic.

I added pallet wood to cover the staples and give the top a finished look.

I added a layer of pebbles for drainage.

I filled the drawer with dirt then planted succulents.


I always knew I wanted to make this freebie some type of planter. And, even though it sat undone for a couple of years, I think it was worth the wait!

Linking To:
Coastal CharmGinger Snap CraftsCreations By KaraRae Gun RamblingsMade In A DayChic On a ShoestringSimply Sweet Home, The Shabby Nest Somewhat Simple,   Live Laugh Rowe, Have A Daily Cup Of Mrs OlsonThe Cottage Market,  Funky Junk InteriorsDIY Showoff, Craft-O-Maniac, Keeping It Simple, I Should Be Mopping The Floor, The Dedicated House Coastal Charm, Reasons To Skip The Housework, Sugar Bee Crafts,  Nifty Thrifty Things, Cherished BlissMad In Crafts, Flour Me With Love, Not Just A HousewifeToday's Creative Blog, Tip Junkie Homework,  I Gotta Create,   Domestically Speaking,  The Answer Is Chocolate, Skip To My LouThe Thrifty Home,Cedar Hill RanchFlutter BusterNap Time Creations, Hope In Every Season, The Foley FamOur Home Away From Home,  RemodelaholicFlamingo ToesVMG206 Finding Silver PenniesA Stroll Thru Life, French Country CottageThe Scoop, Stone Gable, Knick Of Time, Lou Lou GirlsOur Hopeful Home, The Painted Hinge, Savvy Southern Style, Tattertots & Jello, Yesterday On Tuesday, Rachel Teodoro, Worthing Court, Confessions Of A Plate Addict


Related Posts Plugin for WordPress, Blogger...