Showing posts with label vintage. Show all posts

Tuesday, May 25, 2021

Repurposed Brick Mold

 It seems like all of a sudden I'm seeing brick molds everywhere!


I wanted to do something creative with this one & decided a makeover was just what it needed to make it a little less rustic.


I gave the wood a whitewash look with Dixie Belle Paint Company's Voodoo Gel Stain using the color White Magic.


I poured a little of the stain in a container then painted it on with a paintbrush.


Then, while it was still wet, I wiped it back with a damp rag.


I wanted to dress the brick mold up a little more using the Cacti & Succulents Transfer from the Belles & Whistles line from Dixie Belle.


There are 6 sheets in the package. Two of the sheets have an all over design, but the others sheets have separate designs that are easy to cut up & just use a few pieces. 


I cut out the pieces of the transfer that I wanted to use & began rubbing them onto the brick mold using the wooden applicator that comes in the package.


I kept adding to the design until I had the look I wanted.


There are so many things you can use brick molds for...

 add potted plants to them,

add jars to hold silverware at parties,

fill them with seashells,

use them to make large candles...

Or, do what I did!

It just so happens that brick molds are the perfect size to hold 2 rolls of toilet paper. And, it fits perfectly on the back of the toilet!


Linking To:

Monday, December 16, 2019

Beadboard Christmas Tree


I love it when I can grab some scraps & make a project come together!
I've been hanging onto a piece of beadboard for awhile waiting for the perfect project to use it in. So when I found some antique roof tins at an antique store, and remembered that I had a bunch of rusty metal stars, I knew I had found a purpose for the beadboard.

I measured and drew off triangles on the back of the beadboard & cut them out to make Christmas trees.


 I painted the beadboard with the color, Fluff, from the Dixie Belle Paint Company.
 Than I added Dixie Belle's Van Dyke Glaze.

 I used E6000 to glue the beadboard tree onto the roof tin.
 Then I added a star to the top of the Christmas tree.


I'm thinking of making more with green trees. What do you think?


Linking To:

Monday, September 2, 2019

Hope For The Chest

This hope chest was minutes away from going on a burn pile!

A friend called to tell me that he had a few things I might be interested in, but the fire was lit and if I wanted anything I'd have to come right over. Luckily I was able to get there in time to rescue a few things. 

This hope chest was missing the skirt around the bottom that forms the legs. 
 It was also missing the knobs on the faux drawers.
I gave the chest a fresh coat of paint using Dixie Belle's color Caviar.

 Rather than put new knobs on, I used re*design with Prima molds & modeling material to create medallions to cover the holes.
 I painted the medallions with Dixie Belle's Moonshine Metallics using the color, Gold Digger. Then I glued them over the holes using E6000.
 I also painted some small legs that I found at Lowe's using the Gold Digger.
 What a shame it would have been if this chest had gone up in flames!


The lesson...
Call before you burn!
There are plenty of us out there that love to rescue & revive discarded furniture.

Linking To:

Monday, July 15, 2019

To Market We Will Go

We are fortunate to have farmers markets available to us year round here in Fayette County. There’s not much better than fresh produce, locally made cheese, & fresh baked bread.
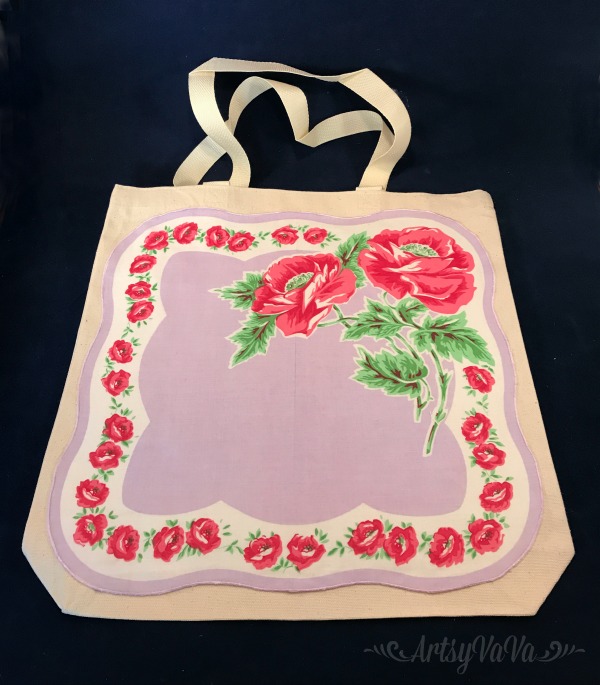
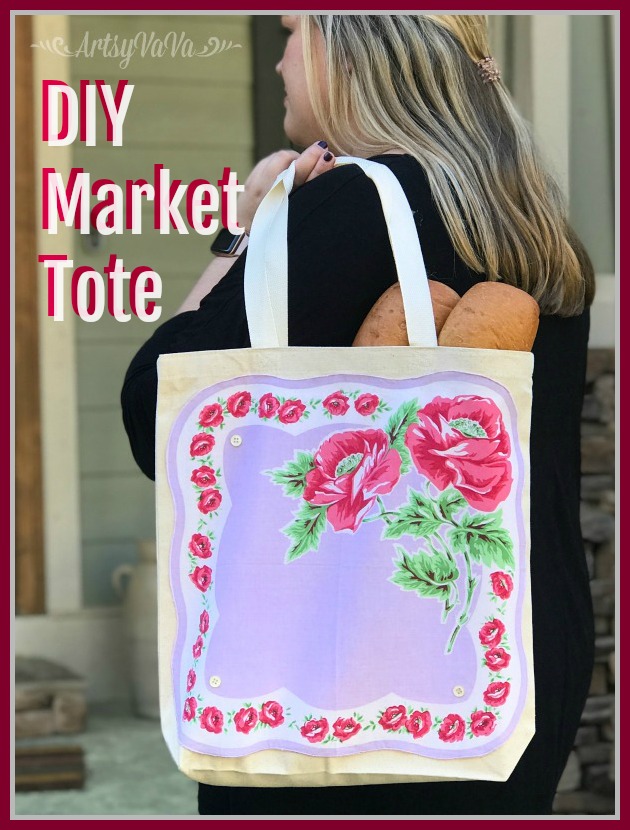
Rather than have your goodies put in a plastic bag that's just going to end up in the landfill, take along a reusable bag. And, with this DIY market tote, you'll be the most stylish shopper at the market.
Supplies:

Canvas Tote
Vintage Handkerchief
Hem Tape
Iron
Buttons
E6000 Glue
 What makes this project so easy is that you don't have to sew! 

Position a handkerchief onto the tote. Place hem tape under the edges of the handkerchief. If the handkerchief has curved edges, you may need to tear off smaller pieces of the hem tape to arrange them around the sections that aren’t straight.


 Using the cotton setting, use the iron to adhere the handkerchief to the tote. 


You can stop there, but why not make it even prettier by adding some buttons. You can sew them on, but I used E6000 to glue them on. 

 You may want to stock up on totes and hankies because you're going to want to make more!!! 
 They also make great gifts!


Linking To:
Ginger Snap Crafts,  Rae Gun RamblingsChic On a ShoestringSimply Sweet HomeHave A Daily Cup Of Mrs OlsonThe Cottage Market,  Funky Junk InteriorsDIY Showoff, Craft-O-Maniac, Keeping It Simple, I Should Be Mopping The Floor, The Dedicated HouseSugar Bee CraftsFlour Me With Love,  Today's Creative Blog, Tip Junkie  I Gotta Create,   Domestically Speaking,  The Answer Is Chocolate, Skip To My LouThe Thrifty HomeFlutter BusterNap Time CreationsThe Foley Fam Finding Silver PenniesA Stroll Thru Life, French Country Cottage,  Knick Of Time, Lou Lou GirlsOur Hopeful Home, My Thrift Store AddictionThe Painted Hinge, Savvy Southern Style,  Yesterday On TuesdayConfessions Of A Plate Addict, My Uncommon Slice Of Suburbia, Dabbling And Decorating


Tuesday, March 19, 2019

Rose & Rouge & The Midnight Sky


My friend, Cindy, & I have been wanting to collaborate on a piece of furniture. When we saw this piece, we knew she was the one.
Now, before you say how beautiful it is and that it shouldn't be painted, it looks to be in much better shape in the picture that it did in reality.

Cindy jump started the process by painting the piece with the Dixie Belle paint color, Midnight Sky. Then I started adding the Rose & Rouse transfer from Prima.
I started by adding the transfer to the reset sections of the top drawer. The transfers are so easy...just rub them on. 


 I highlighted the raised areas with Dixie Belle's Gilding Wax in the color Warm Gold. I just rubbed it on with my finger.
I also added the Gilding Wax to the drawer pulls to brighten them up. 
 There's an oval design on the bottom two drawers. I hand painted a little of the design to fill in the places that the transfer didn't fit into.
 Then I added more Gilding Wax to the raised design.


 Cindy & I added more of the Rose & Rouge transfer to the top back corner.

 Isn't she lovely?

 I think Cindy & I make a pretty good team! We're actually looking for our next piece to work on together. Stay tuned.


Linking To:
Ginger Snap CraftsCreations By KaraRae Gun RamblingsChic On a ShoestringSimply Sweet HomeHave A Daily Cup Of Mrs OlsonThe Cottage Market,  Funky Junk InteriorsDIY Showoff, Craft-O-Maniac, Keeping It Simple, I Should Be Mopping The Floor, The Dedicated House Coastal CharmSugar Bee CraftsFlour Me With Love,  Today's Creative Blog, Tip Junkie Homework,  I Gotta Create,   Domestically Speaking,  The Answer Is Chocolate, Skip To My LouThe Thrifty Home,Cedar Hill RanchFlutter BusterNap Time CreationsThe Foley FamOur Home Away From Home,  Finding Silver PenniesA Stroll Thru Life, French Country CottageThe Scoop, Stone Gable, Knick Of Time, Lou Lou GirlsOur Hopeful Home, My Thrift Store AddictionThe Painted Hinge, Savvy Southern Style,  Yesterday On Tuesday,  Worthing Court, Confessions Of A Plate Addict, My Uncommon Slice Of Suburbia, Dabbling And Decorating


Related Posts Plugin for WordPress, Blogger...