Sunday, April 28, 2019

Keep The Change

I love when I have the exact change to pay for things when I'm shopping. My husband, on the other hand, never spends his change. He always has a pocket full of coins. We put his coins in a jar & it can add up quickly to quite a large sum.
Here, I've created something prettier than the plastic jar we've been using.
Supplies:
Shadow Box
Scrapbook Paper
Scissors or Paper Cutter
Tacky Glue
Print Out Of “Keep the change”
Paint Pen
Tape
Utility Knife
 I took off the back of the shadow box and used a utility knife to cut out a notch at the top where I can insert the coins.

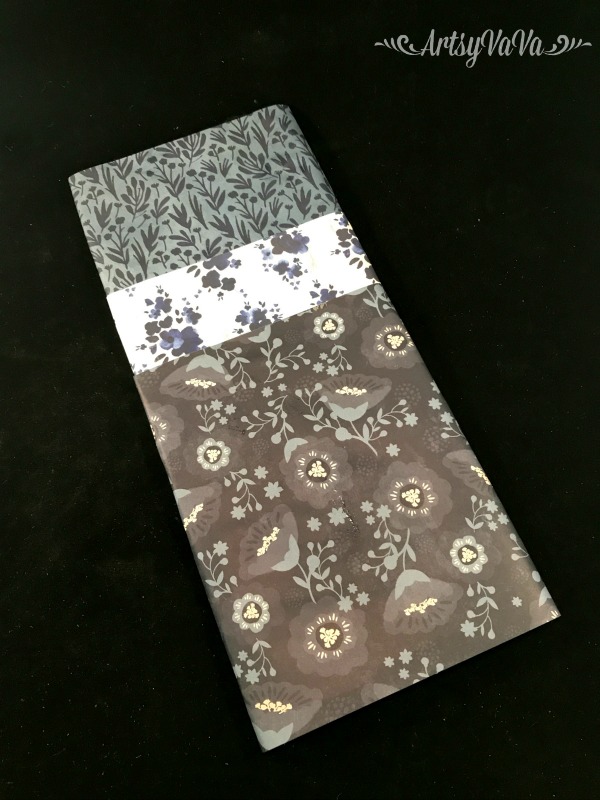
 I picked out 3 patterns of scrapbook paper and cut them to different sizes which will wrap around the back of the shadow box. Once I wrapped the paper around the backing, I secured it on the back with tape.


 I cut the paper around the notch to leave the opening.
 I printed out , Keep the change!, and taped to the inside of the glass. Then I traced over it with a paint pen.


 I put the back on and started filling the shadowbox with change.

 Once full, the shadowbox will hold approximately $200!
Unless, you have someone in your house who likes to steal the quarters!


Linking To:
Ginger Snap Crafts,  Rae Gun RamblingsChic On a ShoestringSimply Sweet HomeHave A Daily Cup Of Mrs OlsonThe Cottage Market,  Funky Junk InteriorsDIY Showoff, Craft-O-Maniac, Keeping It Simple, I Should Be Mopping The Floor, The Dedicated HouseSugar Bee CraftsFlour Me With Love,  Today's Creative Blog, Tip Junkie  I Gotta Create,   Domestically Speaking,  The Answer Is Chocolate, Skip To My LouThe Thrifty HomeFlutter BusterNap Time CreationsThe Foley Fam Finding Silver PenniesA Stroll Thru Life, French Country Cottage,  Knick Of Time, Lou Lou GirlsOur Hopeful Home, My Thrift Store AddictionThe Painted Hinge, Savvy Southern Style,  Yesterday On TuesdayConfessions Of A Plate Addict, My Uncommon Slice Of Suburbia, Dabbling And Decorating


Wednesday, April 10, 2019

The French Fern

No, this isn't a post about gardening. 
It's about a French Provincial chest joining together with a beautiful botanical transfer to be transformed into something quite lovely.
I come across French Provincial pieces quite often.
But, I had never seen one like this with the dividers in the top section.

I also had never see one with bi-fold doors like this.

The piece had a shiny, slick finish, so I gave it a coat of Dixie Belle's, Slick Stick. It's the perfect primer for slick pieces. And anything that prevents me from having to sand is great!

That wasn't the only prep I had to do to this piece. I can usually anticipate when a piece might be prone to bleed through, but I didn't think it was going to happen here. As I finished a coat of the Dixie Belle color, Buttercream, I began to see spots, Then the whole piece turned a pale yellow. Yuck!
So, I grabbed the BOSS. It is great for not only preventing bleed through, but also for blocking odors on some of those stinky pieces of furniture.
After the BOSS was dry, I added 2 coats of Buttercream.

Have you ever had a piece of furniture that the first time you laid eyes on it you knew exactly what you wanted to do with it? That was what happened when I saw this chest. I saw it finished with Buttercream and the Fern Woods transfer from Prima.

 Once I finished painting, I waited 24 hours to add the transfer. I taped around the doors to keep the transfers in the reset areas only. 
I made each door a little different.

I painted the hardware with the color, Palmetto. While the paint was wet, I used a damp rag to wipe it back to expose some of the metal. It gave it a nice patina look.


Ooh la la!  The French & the fern go nicely together, don't you think?


Linking To:
Ginger Snap Crafts,  Rae Gun RamblingsChic On a ShoestringSimply Sweet HomeHave A Daily Cup Of Mrs OlsonThe Cottage Market,  Funky Junk InteriorsDIY Showoff, Craft-O-Maniac, Keeping It Simple, I Should Be Mopping The Floor, The Dedicated HouseSugar Bee CraftsFlour Me With Love,  Today's Creative Blog, Tip Junkie  I Gotta Create,   Domestically Speaking,  The Answer Is Chocolate, Skip To My LouThe Thrifty HomeFlutter BusterNap Time CreationsThe Foley Fam Finding Silver PenniesA Stroll Thru Life, French Country Cottage,  Knick Of Time, Lou Lou GirlsOur Hopeful Home, My Thrift Store AddictionThe Painted Hinge, Savvy Southern Style,  Yesterday On TuesdayConfessions Of A Plate Addict, My Uncommon Slice Of Suburbia, Dabbling And Decorating


Tuesday, April 2, 2019

Botanical Easter Eggs

If you've tried the Re*design With Prima transfers, then you know how addicting they can be. Lately I've been putting them on everything!
So, of course I had to put them on Easter eggs.

I picked up a dozen of these faux eggs at Michael's.
 I cut out some of the botanicals from the Fern Woods transfer.
 It only took about 5 minutes to rub them onto the eggs.

 I placed the eggs in a dough bowl that I filled with Spanish Moss.

 They're perfect in my Easter decor. But, since they're not pastel, I can incorporate them into my decor through the Summer.
While I was at it, I added some of the Fern Woods transfers to some IKEA lanterns. I told you they're addicting!

Linking To:
Ginger Snap CraftsCreations By KaraRae Gun RamblingsChic On a ShoestringSimply Sweet HomeHave A Daily Cup Of Mrs OlsonThe Cottage Market,  Funky Junk InteriorsDIY Showoff, Craft-O-Maniac, Keeping It Simple, I Should Be Mopping The Floor, The Dedicated HouseSugar Bee CraftsFlour Me With Love,  Today's Creative Blog, Tip Junkie Homework,  I Gotta Create,   Domestically Speaking,  The Answer Is Chocolate, Skip To My LouThe Thrifty HomeFlutter BusterNap Time CreationsThe Foley Fam Finding Silver PenniesA Stroll Thru Life, French Country Cottage,  Knick Of Time, Lou Lou GirlsOur Hopeful Home, My Thrift Store AddictionThe Painted Hinge, Savvy Southern Style,  Yesterday On TuesdayConfessions Of A Plate Addict, My Uncommon Slice Of Suburbia, Dabbling And Decorating


Related Posts Plugin for WordPress, Blogger...