Monday, December 16, 2019

Beadboard Christmas Tree


I love it when I can grab some scraps & make a project come together!
I've been hanging onto a piece of beadboard for awhile waiting for the perfect project to use it in. So when I found some antique roof tins at an antique store, and remembered that I had a bunch of rusty metal stars, I knew I had found a purpose for the beadboard.

I measured and drew off triangles on the back of the beadboard & cut them out to make Christmas trees.


 I painted the beadboard with the color, Fluff, from the Dixie Belle Paint Company.
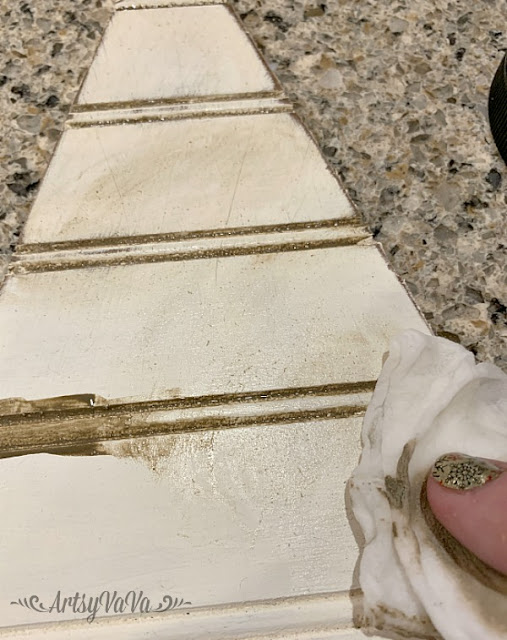
 Than I added Dixie Belle's Van Dyke Glaze.

 I used E6000 to glue the beadboard tree onto the roof tin.
 Then I added a star to the top of the Christmas tree.


I'm thinking of making more with green trees. What do you think?


Linking To:

Monday, December 2, 2019

Not Your Mama's Christmas Village

In October, my husband, son, daughter, & I vacationed in Italy. It was a wonderful trip!
We came home with great memories, but not a lot of souvenirs. One thing I did buy was this cute little wooden house. 

I love the rustic simplicity of it. And, of course, I thought that I could do that!
So, once I got home, I took the idea and made a little Christmas Village.

I drew off the pattern for three houses on a 2 x 4 & had my son cut it.
 I sanded the edges, then stained the wood with Voodoo Gel Stain from the Dixie Belle Paint Company. I love this stain because it is water based so the clean up is easy!
 I painted over the stain with the color Fluff from Dixie Belle.
 When the paint was dry, I sanded the blocks.
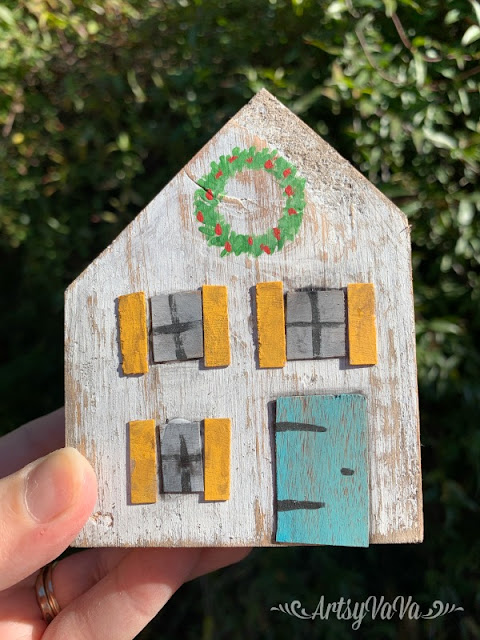
 For the doors and windows, I cut and painted thin pieces of veneer and glued them onto the blocks with E6000.

 I painted Christmas garland and wreaths on the blocks.


They were cute, but I felt like they needed something.
Shutters! That's what they needed.
 On two of the houses, I used veneer to create the shutters, and painted the shutters on the other one.


 Yes! That's what they needed.

 I love my little Christmas village. And it will always bring back fond memories of my trip to Italy.


Linking To:

Friday, November 22, 2019

Rusty Nail Simplicity

I have come across quite a few corner cabinets like this. There must have been a time when a kit or the plans were available. This one came from a lady around 70 who said her father made it.
 It had a terrible finish on it!
I've said before that there are certain pieces that as soon as I see them I know exactly what I want to do for their makeover. This was one of those pieces.
I could envision it with Rusty Nail and Sawmill Gravy from the Dixie Belle Paint Company, and the re*design with Prima transfer, Simplicity.
 I wasn't expecting bleed through on this piece, but whatever was used for that swishy (is that a word?) finish caused my Sawmill Gravy to turn pink. So, I coated the piece with Dixie Belle's BOSS. BOSS prevents bleed through and odors.

Then I painted the inside of the piece with more Sawmill Gravy and added the Simplicity transfer.
 I painted the rest of the cabinet with Rusty Nail.

 What a difference!

Linking To:

Monday, November 11, 2019

DIY Thankful Sign

It's November, the month of Thanksgiving.
This DIY Thankful Sign is the perfect addition to your Fall decor.
And, it's super easy!

I used my Cricut Maker to cut out the word, thankful, in vinyl. If you don't have a Cricut you can buy vinyl letters at craft & office supply stores.
I added the vinyl to a wood sign board from Michael's.
 To help prevent the paint from seeping under the vinyl, I painted over it with the sealer Gator Hide from The Dixie Belle Paint Company. This creates a barrier over the edge of the vinyl so you will get crisp, perfect letters when you peel up the vinyl.
 Once the Gator Hide was dry, I used a makeup sponge to pounce over the vinyl using the Dixie Belle paint color, Fluff. Using a makeup sponge also helps prevent the paint from bleeding under the vinyl.
 I used a brush to paint the rest of the board.
 Once I had painted two coats of Fluff, I pulled off the vinyl.

 I added Mod Podge to a corner section of the board...
 then I placed a napkin with pretty pumpkins over the wet ModPodge. The pumpkins are perfect for Fall, but you could use other napkins to keep the sign up year round. The layers of the napkin need to be separated or the paper won't stick properly.
 I tore off the extra napkin that came over the edge of the board and added more ModPodge on top of the napkin.
 I glued a mini clothespin to the opposite corner of the board.
 I added a family photo from my recent trip to Italy.
 The clothespin makes it easy to change out the photo.

Happy Thanksgiving!


Linking To:
Related Posts Plugin for WordPress, Blogger...