Showing posts with label Door Hanger. Show all posts

Sunday, July 11, 2021

Don't Eat The Gumballs

This adorable door hanger looks like a sweet treat to greet your guests, but don't eat the gumballs!

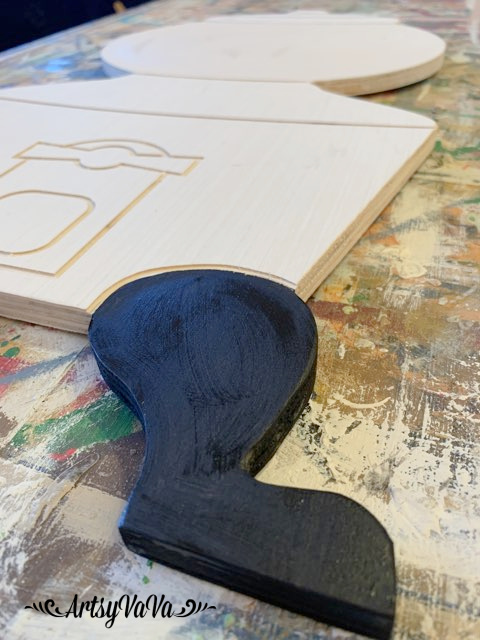
The base material for the door hanger is a wooden cutout from Signopoly. It even has grooves to define the different areas of the gumball machine.


I used the color, Caviar, from the Dixie Belle Paint Company to paint the feet of the gumball machine.
I painted the "glass" globe with the color, Fluff, & painted the rest of the machine with Honky Tonk Red.

I used Dixie Belle's Gemstone Mousse in the color Diamond for the candy chute & knob to make it look like metal.


I used Dixie Belle's black Best Dang Wax to define the details.


I glued on colorful pompoms, using tacky glue, to represent the gumballs. So cute, but not tasty! 


We've all heard of things looking too pretty to eat, and that is literally true for this!


Linking To:

Sunday, March 28, 2021

Blue & White China Inspired Bunny


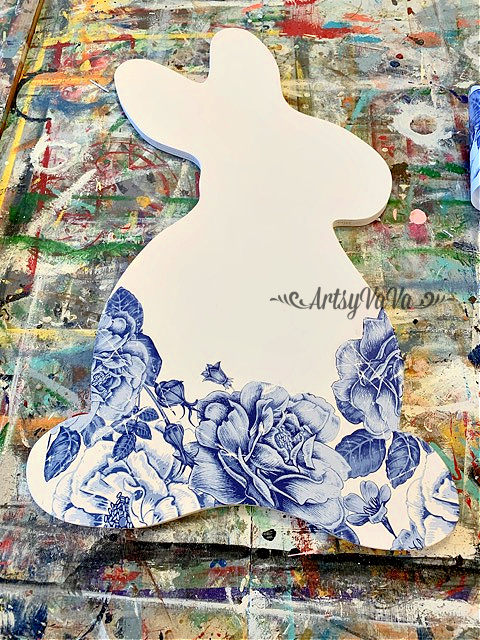
As an ambassador for Signopoly, I get to play with some of their awesome wood cut outs. I see so many adorable whimsical bunnies for Easter, but I wanted to go classic with this one. And there's nothing more classic than blue & white china. I knew the French Ceramics transfer from Re*design With Prima would help me easily achieve the look I wanted.
I painted the wooden bunny with the color Fluff from the Dixie Belle Paint Company. Once the paint was dry, I began cutting out pieces of the transfer & rubbing them onto the bunny.
I didn't want the entire bunny covered with the transfer, so I just added it to the bottom & up one side.
I gave the bunny a wiggly eye, & a pretty ribbon & tied it in a bow around the bunny's neck.
All this sweet bunny needed was a fluffy tail. I used E6000 to adhere a 3" furry pompom to my faux china bunny.
What a sweet way to greet my guests for Easter!

Linking To:

Thursday, February 11, 2021

Quilted Clover


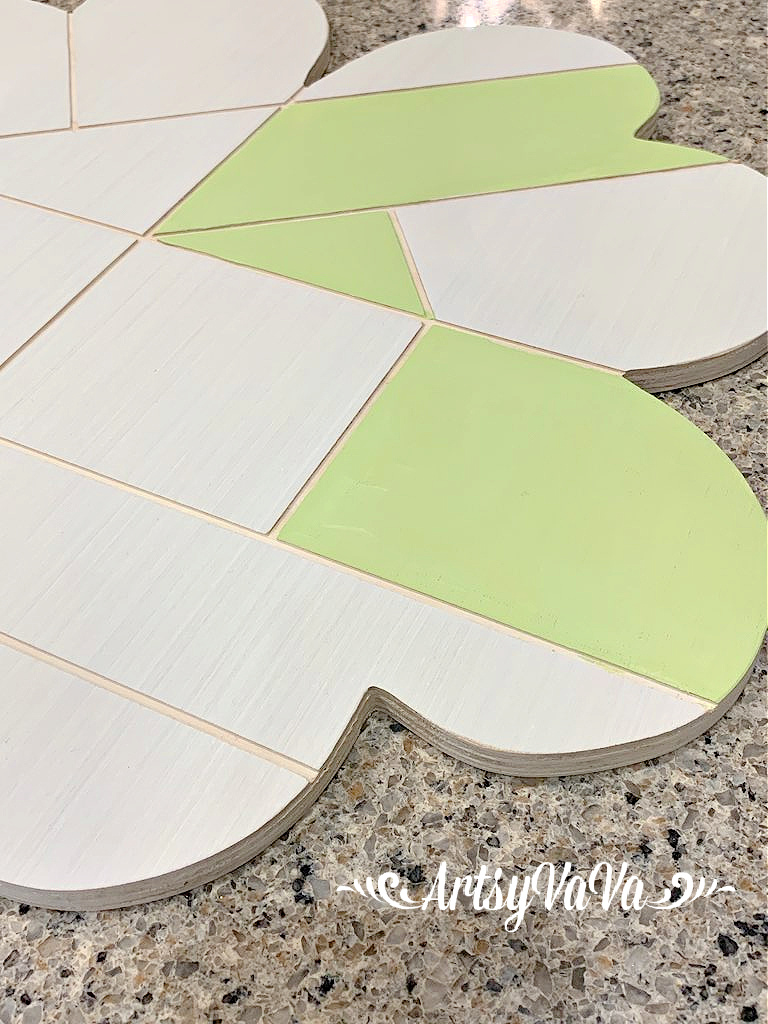
I love changing my front door for every season. So, I was very excited when I received this 4 leaf clover from Signopoly. I'm only a wee bit Irish, but I still love to decorate for St. Patrick's Day.

There are grooves cut into the wood, so I painted some of the sections with the color, Limeade, from the Dixie Belle Paint Company.

Dixie Belle has a new line of silkscreen stencils in their Belles & Whistles line. This was the perfect project to try them out on. I chose to use the Mandala set. Each pack comes with 3 sheets of stencils. There are several designs on each sheet & you get approximately10-12 uses out of each one.

 I placed the sticky side down over the Limeade when it was dry, & stenciled on the color, Evergreen.


The silkscreen gives you a nice crisp design.


My plan was to use the stencil in random places, but I loved it so much that I decided that every section would get stenciled! So I continued on.


I painted the remaining sections with Evergreen & the Moonshine Metallics color, Gold Digger.

When using the metallic, it works best with a similar color underneath as a base. So, I used the color Colonel Mustard before painting Gold Digger. However, I did not need a base color when I used it on the stencil.


Do you decorate your door for every season?

While I was at it, I used the Limeade, Evergreen, & Gold Digger, along with the color Daisy to do a paint pour on another clover. And, of course, I added a little green & gold glitter to this one.

Linking To:

Friday, December 11, 2020

Joy Ornament Door Hanger DIY


I'm not a traditional wreath type of girl and love a great door hanger that I can customize. And, there are so many options available to create something unique.

For the door hanger that is on my front door for this Christmas season, I added a little JOY!

I started with a large wooden ornament from Signopoly.

I painted the ornament with the color, Fluff, from the Dixie Belle Paint Company.
I used painters tape to add grain sack stripes with the color, French Linen.

To soften the paint colors, I washed over the French Linen with the Fluff, then washed over the Fluff with Grunge Glaze.
I cut a J and a Y with my Cricut Maker to make a stencil.
When you apply Cricut vinyl to a surface you put transfer tape over it to be able to place it easily and keep wrinkles out of the vinyl. Once I peeled up the transfer tape, I placed it at the top of the vinyl. Because the letters are close to the edge at the top of the vinyl, the tape will act as a barrier when I stencil so the paint won't go outside of the vinyl and end up where I don't want it.
I used a makeup sponge to apply the color Evergreen to the stencil. I did 3 thin coats to get good coverage.
I added Gemstone Mousse in the color, Diamond, to the top of the ornament and gave it a little accent of the paint color, Coffee Bean.

I placed a boxwood wreath between the J and Y to represent the O. I used a combination of hot glue and E6000. Hot glue will hold for now, but E6000 will hold forever.
A little JOY for my door!


Linking To:

Monday, September 21, 2020

Patchwork Pumpkin


I've used wood cutouts from Signopoly for a couple of years now. So, when they asked me recently to be a Signopoly Ambassador, I was thrilled. As an ambassador, they send me things to play around with. And, when they sent me this new pumpkin design, I immediately thought of a quilt.

I knew that I wanted some of the sections to be patterned. If you've followed me for awhile, then you know I love crafting with patterned paper napkins. When I found these napkins at Hobby Lobby, I knew they'd be perfect for this project.
I cut the napkins to fit in 6 of the sections.
I used ModPodge to adhere the napkins to the pumpkin then went over the top of the napkins with another coat of ModPodge. I let the excess part of the napkins hang over the edge until dry, then lightly sanded to remove the loose paper.
I used the colors Florida Orange, Rusty Nail, & Colonel Mustard from the Dixie Belle Paint Company to fill in the remaining sections of the pumpkin.

To define each section & make the pumpkin look more "finished" I added Dixie Belle's Best Dang Wax in the color brown. I filled the grooves with the dark wax using a stiff brush, then wiped it back. To make the wax easier to control, I first added clear wax to the pumpkin on the flat surfaces making sure to keep it out of the grooves.


Of all the Signopoly projects I've done over the years, I think this one is my absolute favorite!


Linking To:
Related Posts Plugin for WordPress, Blogger...