Pages

Friday, October 18, 2024

Tree Frog And The Flower Child


This is one of those projects that I was so excited about starting that I forgot the "before" picture. But, we've all seen them... traditional little side table, stained, with a faux leather top.

This one was not in the best shape & needed some love. The bottom had a few scratches, but the leather top was in really bad shape.

To bring this little table back to life, I started by painting the wood with the color, Tree Frog, from the Dixie Belle Paint Company. Tree Frog is one of my favorite colors! 

Tree Frog is such a bright, vibrant color, that it's not for everyone. But, when you add a dark wax or glaze over the paint, it tones it down. So, I added Dixie Belle's Best Dang Wax in black.

I used a stiff bristle brush to add the black wax to the grooves & any recessed detail. I put the wax on heavy, then wiped it back with a rag.

I left the wax heavy in the grooves & used the wax left on the rag to add a thin layer of wax over the rest of the table. This not only tones down the green, but also seals the paint.

As I said earlier, the leather top was in bad shape. Even painting it with the color, Caviar,  didn't hide the imperfections. So, I grabbed the Flower Child transfer from Dixie Belle to hide the damage.

With the transfers, you remove the white backing, position the design where you want it, then rub over the design with a burnishing tool that comes with it.

I burnish over the entire design, then start lifting the plastic cover, burnishing towards where I'm lifting as I go. If any of the design comes up with the plastic, I lay it back down & burnish until it adheres.


The sections of the design line up easily.

Some parts of the design I overlapped as I went around the table with the transfer.

I made sure to continue the transfer on the sides of the top of the table.

I know this look isn't for everyone. However, every piece I've painted with Tree Frog has sold quickly. And, this piece was no exception.

I had this table for sale in a local shop. I live in a town with a large film studio & someone from the studio came in looking for whimsical furniture. SOLD!

I have no idea if it was purchased for a movie or tv show. If you happen to spot it, please let me know!!!


Linking To:

Saturday, August 31, 2024

A Sentimental Sign

 My father was always a hard worker & provided well for his family. When he retired late into his 70's, he didn't know what to do with himself. So, he got a job working in the club house of a golf course. He loved it! It was fun for my children too. He would take them for golf cart rides & let them putt. My daughter took her first steps in that club house. 

I lost my father 20 years ago, & the golf course has since been replaced by a hotel. Only the memories remain. And when a fellow junker posted pictures online of 2 signs he had for sale, my jaw dropped. They were the signs from the golf course where my father worked. I had to have one! So I called my junkin' friend & had him hold one for me & went as quickly as I could to get it.


My husband & I got the sign home, then I put my son to work turning the sentimental sign into a table for our screened porch.

My son, John, is extremely talented! He is an architect by profession. He can build just about anything you want. He also creates fantastic leather items. You can check him out at handcrafted_architect on Instagram & Hand Crafted Architect on Facebook.

John built a frame to hold the sign. It's huge so he put lots of support underneath. He used 4"x4"s for the legs with 2"x4"s for braces. I stained the legs & braces with Voodoo Gel Stain from the Dixie Belle Paint Company in the color Tobacco Road.


I Painted the 2"x4" boards that frame the sign with the chalk mineral paint color, Fluff, from Dixie Belle. The letters on the sign were worn, but I chose to not touch them up, but rather leave them worn. It adds to the character.

John left a lip around the sign to be able to add resin. He used a 2 part resin that you mix together. If you've ever used resin, you know that some of them will yellow over time. I've yet to find one that doesn't. If you know of one, please share it with me!

This project was actually done several years ago (sorry, I'm just now sharing) &, you guessed it, it yellowed. 

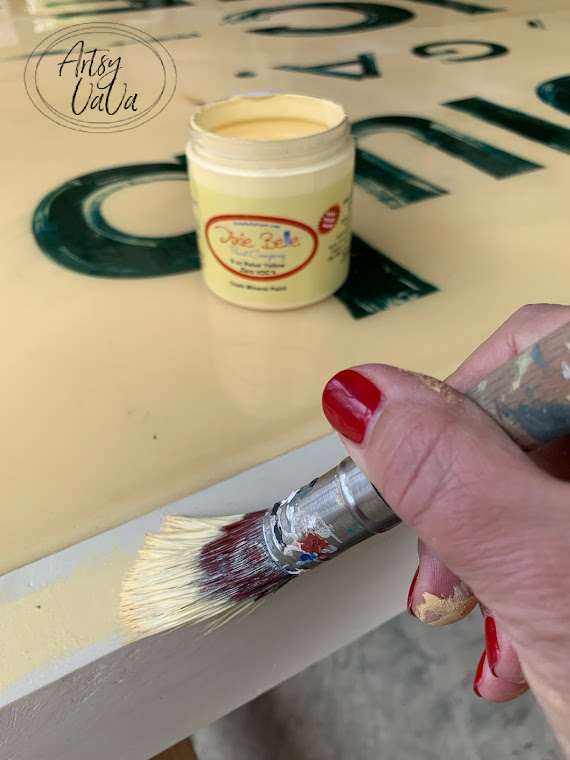
But, not to worry, I just painted over the Fluff border with Rebel Yellow. It was a perfect match!


John also built the benches.

We can easily fit 12 people at the table... 14 if we add chairs at the ends.

The sign brings back so many wonderful memories. And, we are creating more memories as we gather around the table.


Linking To:

Wednesday, May 8, 2024

Mother's Day Tussie Mussie

A tussie mussie is a cute way of saying, "bouquet" & Mother's Day is a great time to create one. This is a simple and easy way to create a sweet little gift whether it's for Mother's Day, a birthday, or just because.

 I have seen people coloring white flowers using food coloring & have wanted to try it. So I bought some babies breath & put some in a mason jar with red food coloring, some in a jar with yellow food coloring, & left some white.


The yellow started to work immediately. The red was slower to start changing color so I added more of the red food coloring. For good measure I went ahead & added more yellow too. It was so interesting to watch them changing colors.

I left them in the jars until all the water was gone. This will dry the flowers & they will last for years. You just have to be gentle with them so you don't knock the flowers off the stems.

To make the tussie mussie, I cut a piece of cardstock into a 5.25" square.

I rolled the cardstock into a cone shape, securing it with tacky glue as I went.

I added the flowers, also securing with tacky glue.

I added a lace & burlap ribbon around the cone...

I used a punch to cut a tag using the same cardstock.

I wrote. "Happy Mother's Day" on the tag & glued it onto the cone.

I finished it off with a little bow.

I loved watching the flowers change colors. I saw some white daisies growing on my property that I think will be my next experiment.


Linking To:

Friday, March 29, 2024

Easy Printed Image Transfer

 When I came across these packages of 4" winter signs at a discount store, I bought several packages. I've done quite a few projects where I cut 2x4 boards into 4" squares. So, I knew these blocks would make future projects easy.


After having these for awhile, I finally decided to recreate a project that I did in 2016. You can see that post HERE.

In this new version, I painted the blocks with 2 coats of Dixie Belle Paint Company's chalk mineral color, Buttercream. I left the ski graphics on the other side of the blocks in case I want to use them in the winter. Once dry, I stained the side with Dixie Belle's Voodoo Stain using the color, Tobacco Road. 

I used a damp rag to add a little of the stain to the front of the blocks to give them an aged look.

I found 3 bird images on The Graphics Fairy that I wanted to use. I resized them to fit the blocks, then printed them using my laser printer. If you use an ink jet printer, the ink will bleed. If you don't have a laser printer, you can print your image with an ink jet printer, then take it to an office supply store to make copies. They typically use laser printers, but check to make sure first.

If your image has writing on it, make sure to mirror the image or your finished product will have backward writing.


I covered the blocks with Dixie Belle's Satin Clear Coat, then laid my bird images printed side down onto the wet blocks. 

In the original post, I cut closely around the bird, then coated the paper with clear coat. But in this version, I cut the images in squares approximately the size of the blocks. I also coated the block with the clear coat instead of the paper.

I waited overnight to make sure the image was transferred, then placed a wet paper towel over the paper. I let it sit for about 30 minutes to make sure that the paper was fully saturated. Then I started rubbing the paper away. I added a little water whenever it felt as though the paper was getting dry.


When dry, if the image started to appear cloudy, I added more water, then rubbed the excess paper off.

I gave each finished block a coat of Dixie Belle's Satin Clear Coat.


I love how these turned out!


Linking To: