Pages

Thursday, December 14, 2023

Felt Snowman DIY

 On a trip to Scotland last May, I met wool felting artist, Karen Price. I was fascinated with her work & she took the time to show me the process of how she creates her art. You can view her work HERE.

I was so excited to give it a try, that I ordered a kit & it was waiting on me when I got back home. Here is the finished project. It's not perfect, but for my first piece, it was fun & I don't hate it.


In the Fall, I made lots of felted acorns...


Recently I was in a shop that had some cute felt snowman ornaments & I knew I had all the supplies at home to try and make a similar one. So, I grabbed a styrofoam ball, white wool roving, & felting needles.

I pulled off a piece of the wool roving and then pulled the fibers apart so they weren't so tight together.

I wrapped the wool around the styrofoam ball & used the tool that holds 3 needles to start pushing the wool into the ball.

Here you can see where the right side of the ball is covered & the left side isn't yet covered.

I continued until the entire ball was covered with the wool.

Once the ball was covered in white wool, I grabbed some red roving, pulled off a section & tied a knot in the middle. The knot gives me a base to start making the ear muffs.

I switched to the tool that only holds one needle & began wrapping the wool around the knot & poking it with the needle. These leather finger covers are great. If you poke yourself with the needle it hurts! I learned the hard way.

I continued wrapping the red wool & poking it with the needle until I had a ball the size I wanted to make ear muffs. I made 2 of these.


I took a little black wool & used the single needle to press it into the white ball to make the eyes.


I used wired holiday tinsel ribbon to make the strap of the ear muffs.

I used a little more black wool to form the mouth.

I used tacky glue to add the muffs.

For the nose, I dipped a toothpick in orange acrylic paint, let it dry, then broke it so I had an inch long piece. Then I pushed it into the styrofoam.


I used floral wire to make a hook to hang my snowman ornament.

This was so much fun to make! I'm still no expert, but I'm going to keep trying my hand at wool arts.


Linking To:

Sunday, October 22, 2023

Secret Path To A Table Makeover

 Have you heard? Dixie Paint Paint Company has added 6 new colors to their chalk mineral paint line. That brings the number of colors they offer to 75! A few of those 75 colors have been semi retired & come in 4oz only, but are still available. So, if one of those colors is a favorite, you cam still get it. Thank goodness, because I love Tree Frog Green!

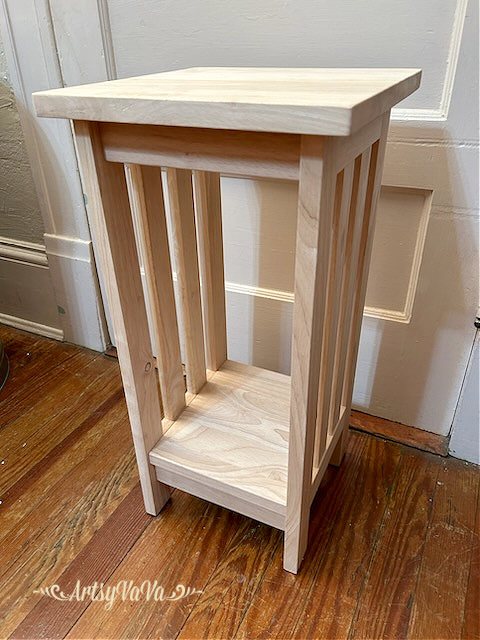
I have had this unfinished wood table for quite some time. I just couldn't decide what I wanted to do with it.

Once the new colors came out, I decided that Secret Path was the perfect color for the table. It's a beautiful mauve color.

I grabbed my favorite synthetic brush, the Dixie Belle Mini, & gave the table 2 coats of Secret Path.

It would have been pretty left alone, but I had the Cacti & Succulent transfer & loved how the colors worked with Secret Path. I always wait at least 24 hours after painting before adding a transfer. So, the following day, I picked a part of the design that I wanted to use for the top of the table. The transfer package comes with 4 sheets that have different designs.

I removed the white backing from the transfer, then started rubbing over the clear top sheet with the tool provided to transfer the design onto the table. Please note: the piece I'm pulling up in the photo appears white the way the light hits it, but in actuality it is clear.

The design was a perfect fit!

Once the design was transferred, I buffed over it with a rag to make sure every piece of the design was adhered.

Finally, I used Dixie Belle's Easy Peasy Spray Wax to seal the table. It really is easy peasy... just shake, spray, & smooth out & your done!


Linking To:

Monday, August 14, 2023

Pressed Flower Art

 About a year ago, I attended a class with my daughter & some friends, where we made trinket dishes using clay & pressed flowers. The class was taught by Brush And Blossom. I usually teach art & craft classes, so it was nice to be the student for a change. 

After the class, I became a little obsessed with gathering & pressing flowers. I would pick flowers from my yard, & there are beautiful wildflowers & weeds growing along my dirt road. 

To press them, I placed flowers, ferns, leaves, etc. between 2 sheets of  paper, then placed the paper between sheets of parchment paper, & placed them in a book. I have a huge dictionary that works perfectly. 


I have so many pressed flowers but have only done a few projects with them. At Christmas, my son & daughter-in-law gave me packs of these fun stickers. I added some of my pressed flowers to them to make pretty bookmarks.


I wanted a better way to display the flowers rather than hidden in a book. So, I came up with an easy art project using the flowers & the stickers.

I started by painting a wooden canvas with the color Caviar, from the Dixie Belle Paint Company. 

I set the canvas aside to dry, & painted a simple wooden frame with Dixie Belle's color, Weeping Willow.


When dry, I glued the frame to the canvas.


The hardest part of this project was deciding which one of the stickers to use. There are several different ones in each pack, & I have 6 packs.

Once I decided on the one I wanted to use, I peeled off the clear back, & added flowers to the sticky side of the bottle design. 


When making the bookmarks, I add the clear backing back onto the "bottle". But for this project I left it off so I could simply stick it onto the canvas inside of the frame.


I then added a few flowers at each bottom corner of the canvas using ModPodge.


I added a fern across the top of the canvas to complete the project.

Now to figure out what to do with all the other pressed flowers I have!

Linking To:

Sunday, July 30, 2023

Dragonfly Art With Terra Clay Paint

 One of my favorite things about summer...

dragonflies!

I also love creating art with Terra, a clay based paint from the Dixie Belle Paint Company. So, I combined my love of both dragonflies & Terra to create a pretty piece of art.


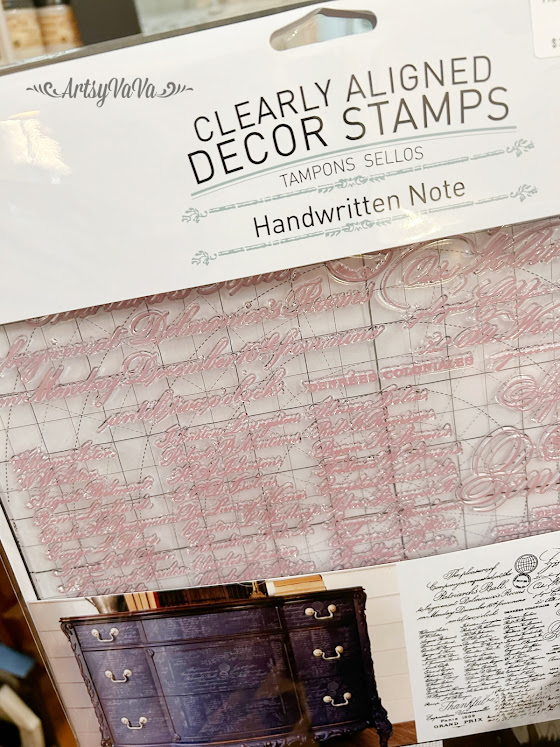
I started by painting a wooden canvas with Dixie Belle's chalk mineral paint in the color, Caviar. Then I used a Re*design With Prima decor stamp  called, Handwritten Note, along with Dixie Belle's metallic paint to add an all over design to the background.

I used my Cricut Maker to create a vinyl stencil of a dragonfly, & placed the stencil on the center of the canvas.

Now for the fun... I started finger painting with Terra.


Terra is perfect for furniture, especially if you want a blended or ombre look. It reactivates with water so once you mist it with water, you can move it around. Because it reactivates with water, it is very important to seal it, especially if you use it on furniture.

Once I laid out a few colors, I used my mister bottle to add a little water so I could easily blend the colors. 


If I had painted the background color with Terra, it would have blended with the dragonfly colors once I wet it. That's why I used chalk mineral paint as the base. Another option would have been to use Terra, then seal it before painting the dragonfly.


Once the Terra was dry, I added Chameleon Wax to the body of the dragonfly. This is an iridescent wax that looks  different depending on the color it is applied over.


I used my finger to apply the wax.


I peeled up the vinyl stencil to reveal my pretty dragonfly.


Here is a piece of art I created after watching a video by Melissa of  The Top Drawer RVA. She shares the steps to painting beautiful roses with Terra. You can find her tutorials HERE.


Linking To: