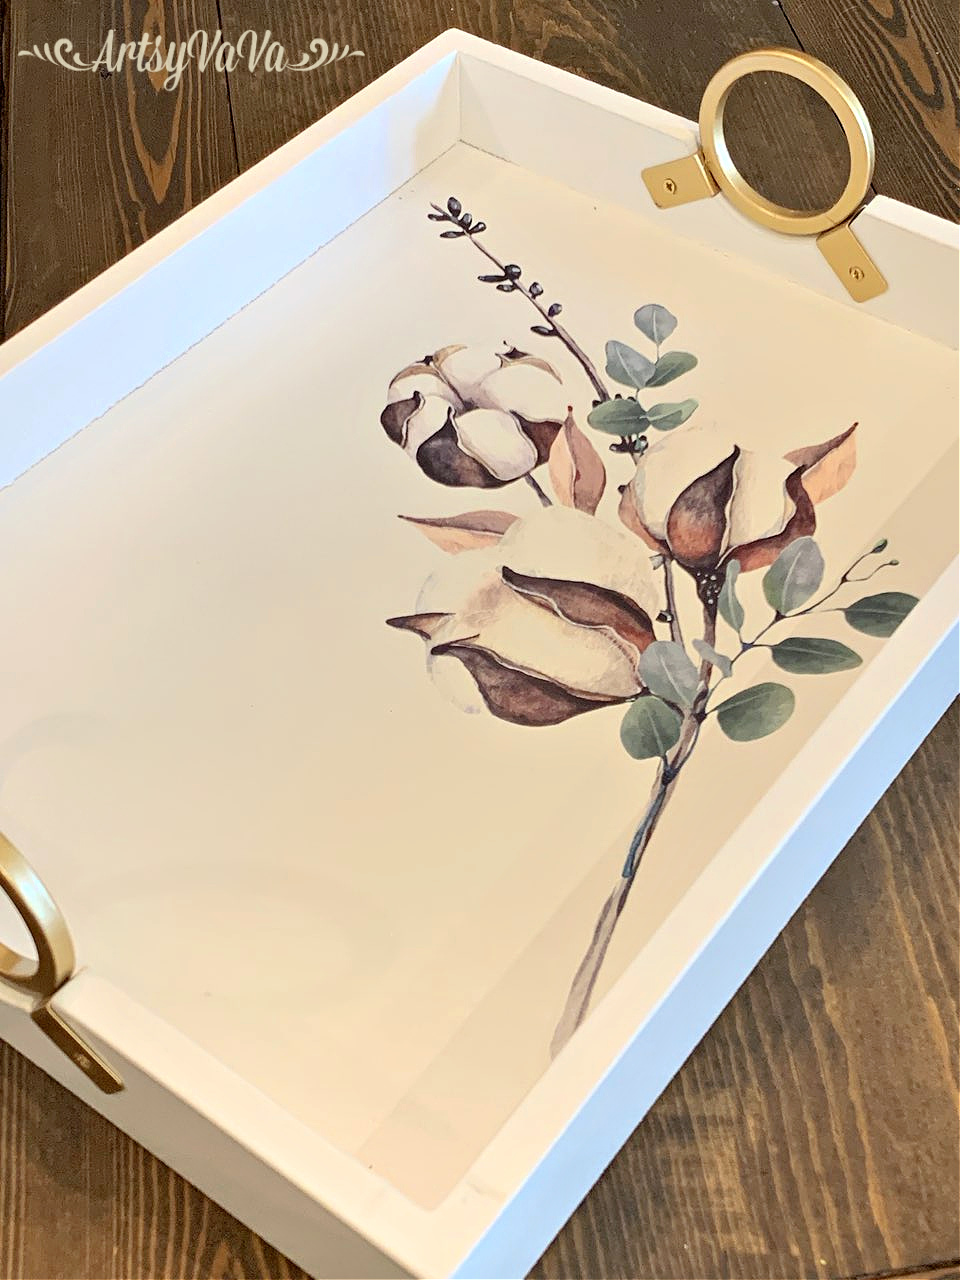
I couldn't resist this pretty tray from Target with the unique handles. But as usual, I couldn't leave it alone. I had to add a little something to it.
If you saw my last post, you saw how I used the Cotton & Eucalyptus Transfer from the Dixie Belle Paint Company on a tobacco basket makeover. There are so many design elements to the transfer, that you can do a lot of different projects with the one package.
So, I decided to use another design from that transfer on the tray.
There are 4 sheets in the package with multiples of several designs. I cut out the design that I wanted & peeled off the white backing.
I placed the design with the clear overlay where I wanted it on the tray & rubbed over it with the applicator stick provided in the package.
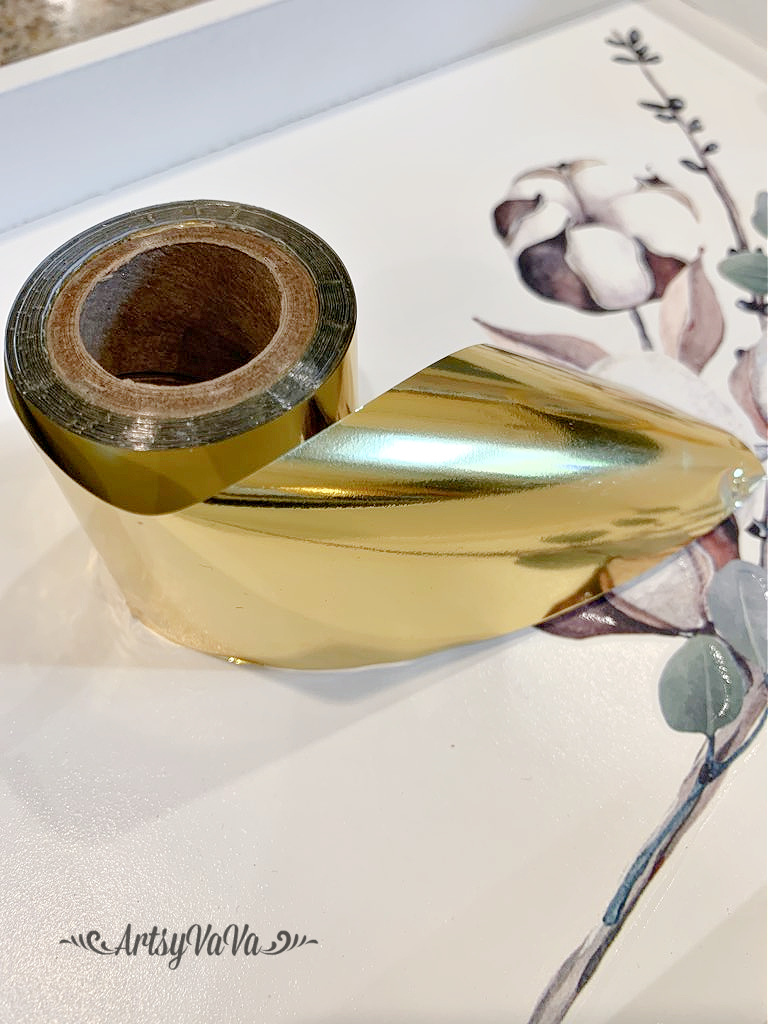
The tray was pretty with the cotton, but again, I can never leave well enough alone. And, there's a new product from Dixie Belle that I wanted to use, & this was a great project to try it out.
Dixie Shine gives the look of gold leaf but without the mess or waste. It comes in 3 colors, gold, silver, & copper. I chose to use gold to go along with the gold handles on the tray.
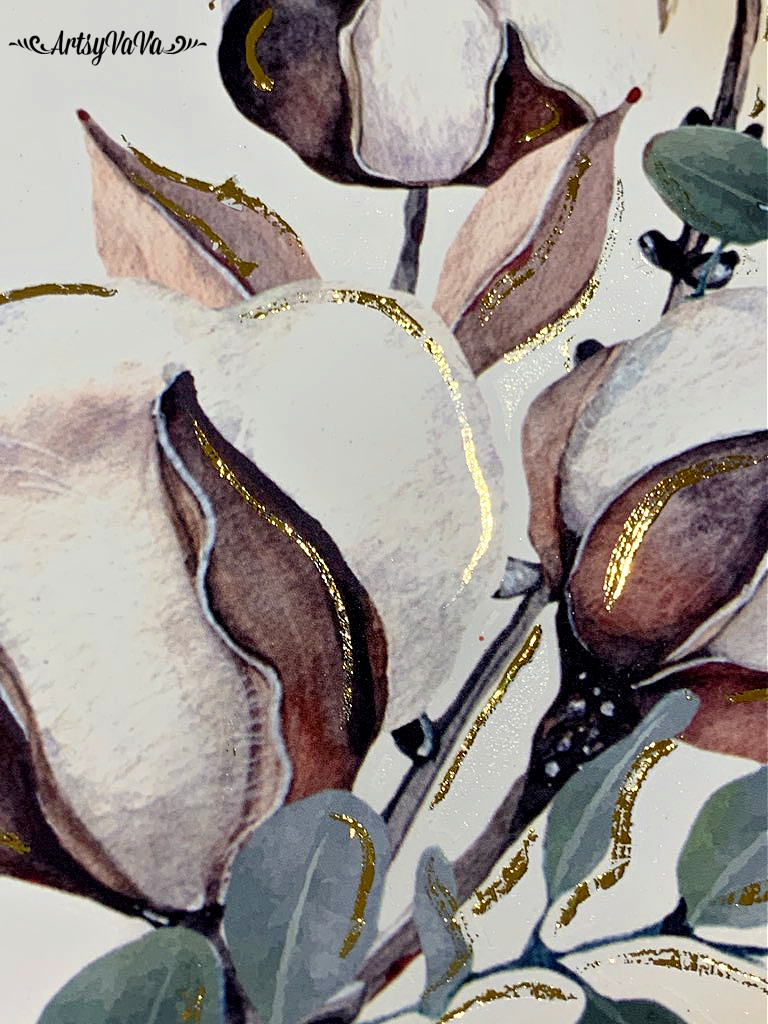
To use Dixie Shine, you first have to apply the glue, Stick With Me. I used a small artist brush to areas where I wanted the cotton to have a gold highlight.
Once the glue is added, you have to wait at least 15 minutes before adding the Shine. You can wait longer if you want. The glue will stay sticky until covered with Shine
Dixie Shine comes on a roll with plenty to do lots of projects.
I cut off a small piece of the Shine, then started laying it over the glue, rubbing over it, then peeling it up
Like I said earlier, there's no waste. The small piece of Shine that I cut can be used over & over until all the gold is gone. You can see here where the glue has pulled off the gold & there is more left that can be used.
Dixie Shine gave just enough gold shimmer to tie in with the gold handles of the tray.
Linking To:
Ginger Snap Crafts,
Chic On a Shoestring,
Simply Sweet Home,
The Cottage Market, Funky Junk Interiors,
Sugar Bee Crafts,
Flour Me With Love,
The Answer Is Chocolate,
Skip To My Lou,
The Thrifty Home,
Flutter Buster,,
Finding Silver Pennies,
Our Hopeful Home,
My Thrift Store Addiction,
The Painted Hinge,
Yesterday On Tuesday,
Confessions Of A Plate Addict,
My Uncommon Slice Of Suburbia,
Creatively Beth,
My Hubbard Home,
County Road 407,
Pieced Pastimes,
Southern Sunflowers
![]()