Pages

Monday, December 27, 2021

DIY House Number Sign

 I am fortunate to know a few people in the construction business who give me things before they go on the burn pile. Sometimes the fire is already lit & I have to act fast! Recently I was given some beautiful old molding that came out of a house before a remodeling job. It was perfect for creating my new house number sign.

I cut the molding to get a piece that was 8" long, then glued and clamped it to an 8" x 20" sign blank from Signopoly. I allowed it to dry overnight.
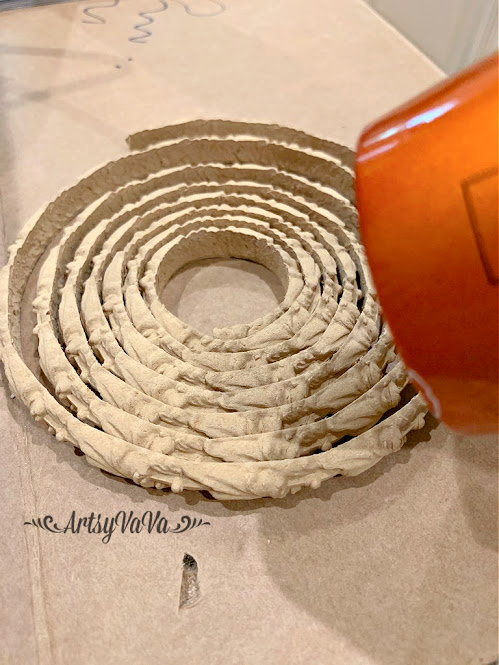
I grabbed some of my WoodUBend trim to add to my sign. The trim is very brittle, but once you add heat to it, it becomes flexible.

You can use a heat gun on the WoodUBend, but it also works well with a hair drier. I put my hair drier on the HOT setting & warmed the trim until it was pliable.
Using an Xacto knife, I cut two sections of the trim to fit across the sign. 
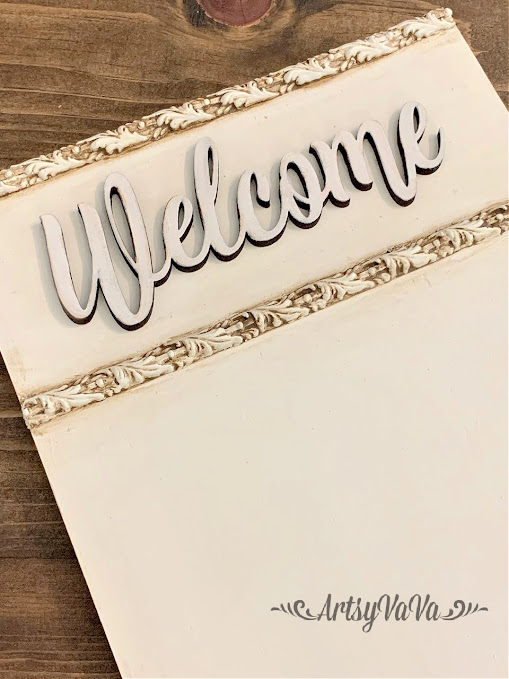
I glued them onto the board using E6000.
I painted the entire piece with the color, Fluff, from the Dixie Belle Paint Company. I did 2 coats for good coverage.

To accentuate the details of the trim & molding, I added Dixie Belle's glaze using the color, Van Dyke Brown. I painted the glaze on heavy to ensure it got down into all the grooves of the trim & molding.
I used a damp rag to wipe away the excess glaze.

I added more glaze to the board so there wouldn't be such a stark contrast between the "dirty" trim & bright white board.

I painted a wooden "Welcome" from Signopoly with the color, Fluff. The laser cutter leaves the edges of the cutout dark. I was careful not to paint over the edges so I would have the contrast between the welcome & the board. I glued the welcome onto the board between the 2 pieces of WoodUBend trim using E6000.
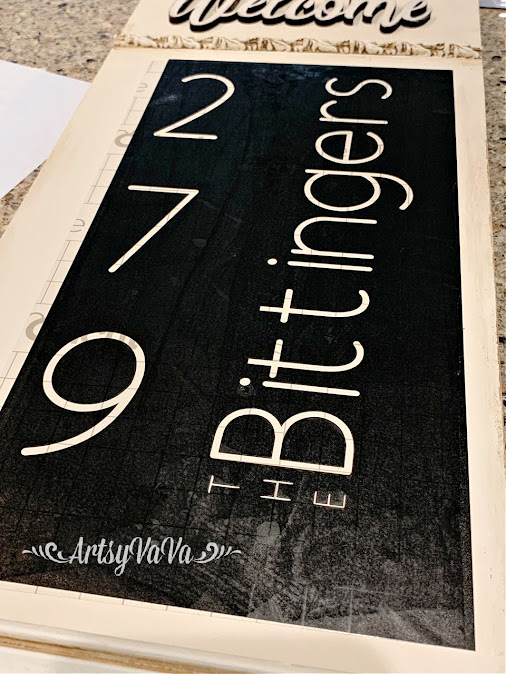
I made a vinyl stencil using my Cricut Maker.
These stencils work great, but for added protection from paint bleeding under the stencil, I added Dixie Belle's Clear Coat. This creates a barrier to prevent bleeding.
Once the Clear Coat was dry, I used a makeup wedge & the color, Coffee Bean to paint over the stencil. I did 3 thin coats using a pouncing motion.

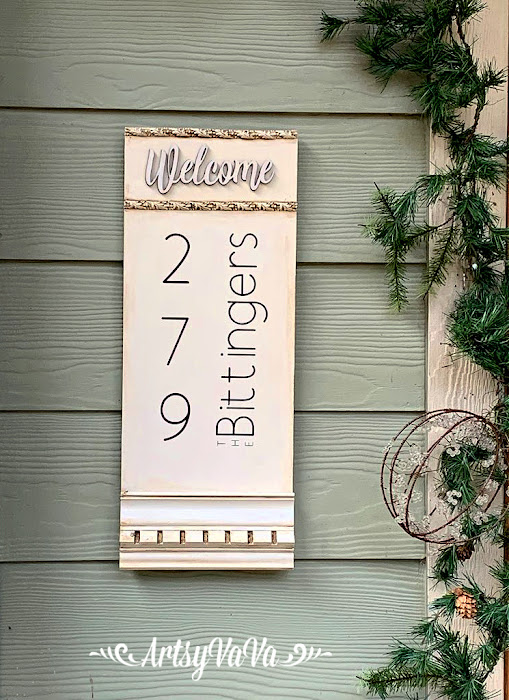
Now there's no question whether you are at the right house or not!


Linking To:

Thursday, November 18, 2021

Rusty Leaf Garland

Fall is usually slow to arrive here in the South. And, the Georgia pines greatly outnumber the colorful trees. However, yellow, red, and orange still make an appearance. Even as the leaves fade from the colors of Autumn into a rusty color, they're still beautiful. And for a girl who loves rust AND Fall, this project perfectly combines both.

I started with wooden leaves from Signopoly.

I gave the leaves a coat of Dixie Belle Paint using the color Sand Bar. The color of paint doesn't matter, because it isn't going to show in the end.
To create the rust, I used Dixie Belle's Patina Collection. 

The patina paint has tiny metal particles in it. The paint needs to be shaken well to distribute these particles.

After shaking the patina paint really well, I gave the leaves one coat of Iron Patina Paint. 

Once the first coat was dry, I gave the leaves a second coat of the Iron Patina Paint. While the paint was wet, I sprayed the leaves with the Green Patina Spray.

The paint will react to the spray and create rust. The process begins quickly, but may take up to six hours to finish reacting.

The hardest part is waiting for the process to end. But, I managed to walk away and finish the project the next day.

I used twine to string the leaves together for the garland.


I'll hate to see the leaves go, from both the trees and my mantel. 

Linking To:

Monday, September 27, 2021

Candy Corn Garland

 You may not like the taste of candy corn, but it sure does add a fun, colorful touch to your Fall/Halloween decor.


This was such a fun project!

I started with wood candy corn cutouts from Signopoly

I painted them with the colors Fluff, Colonel Mustard, & Florida Orange from the Dixie Belle Paint Company.


I used a Sharpie paint pen to add a little detail.


Each candy corn has 2 holes drilled in them. I strung twine through the holes and secured it on the back with packing tape.


I cut slits about an inch apart in three different fabrics. Then I tore the fabric into strips. Tearing it will give a frayed edge. Each strip is approximately 15" long.

I tied the fabric strips into a know around the twine, halfway between each candy corn.


This candy corn is cute, festive, & calorie free!


Linking To:

Sunday, August 22, 2021

Fall Leaf Beaded Garland

Fall is my favorite time for crafting. And, because there's never enough time to do all the projects I want to do, there's no better time to start Fall crafting than Summer!
Beaded garlands are all the rage right now. I see them in every home decor store I go in. So, why not stay on trend, but with an Autumn twist? So, I asked my friends at Signopoly to cut me some 5" leaves with a hole in the top to string them.
Leaves are never just one solid color & I wanted my leaf to have several colors along with some texture. To create the texture, I mixed the color Colonel Mustard from the Dixie Belle Paint Company with Dixie Belle's Sea Spray texture additive.
Once the paint & Sea Spray were mixed well, I spread the mixture over one side of the leaf using a hotel key card.

Once the leaf was covered, I pressed the key card flat onto the mixture & then lifted it to create peaks.

After I set the leaf aside to dry, I placed 25mm wooden beads onto a skewer & began painting them with 3 colors, Colonel Mustard, Terracotta, & Florida Orange. I painted a total of 24 beads.
Once my leaf was dry, I painted over it with the Terracotta & Florida Orange, making sure not to blend them to create just one color.

Once the paint was dry, I sanded the leaf to expose some of the Colonel Mustard.

To create the garland, I threaded twine through the hole in the leaf, tied a knot, & left a 3" tail.

I began stringing the beads onto the twine & the tail.
Leaving a tail keeps you from having to cut close to the knot, which could make it fray. 

I continued threading beads onto the twine until there were 24 beads. Once the beads were threaded, I left a long tail of twine.
No beaded garland is complete without a tassel! 
 I used an orange & a yellow ribbon to add some color to my tassel. To measure, I wrapped the ribbon around a hotel key card twice, then cut it in half so I would have 2 equal lengths of both ribbons.

I began wrapping the key card with twine.

Every few wraps, I added ribbon.
I continued until I had the size tassel that I wanted.
I slipped the twine & ribbon off of the key card, & tied a knot at the top with the tail of twine.


I cut a piece of the orange ribbon & tied it about an inch from the top of the tassel.
I cut the twine at the bottom of the tassel, then trimmed the twine & ribbon to be even.

It's a little early to put out Fall decor, especially when it's still so hot out. But, when the temperature cools down & leaves begin to turn colors, I'll be ready!


Linking To: