Pages

Sunday, June 28, 2020

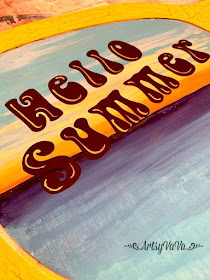
Hello Summer Door Hanger

I'm back with another fun project to celebrate Summer... my favorite season!
I've shared quite a few of the wooden cutouts from Signopoly that make great door hangers or home decor. And, these sunglasses are super cute!
 I painted the frame with the color, Tree Frog Green. This is just a base because I did something fun with this color later on.
 If you've been here before, then you know that I love Dixie Belle Paint & use it for everything. It's intended for painting furniture, but the colors are so gorgeous that it's great for projects like this.
I painted an ocean sunset on the glasses...


 Then I added some palm trees...
 I made a vinyl stencil using my Cricut Maker to say, "hello summer." 
I added a yellow highlight to the letters.

 I added Dixie Belle's Crackle medium over the Tree Frog Green and let it sit overnight before adding a top color.
After letting the Crackle medium dry overnight, I painted over it with the color, Daisy.
 I used a Prima mould & modeling material to create a little flower embellishment for the corners of the glasses.
Hello Summer!!! Let the fun begin!


Linking To:

Sunday, June 21, 2020

Red, White, & BOHO, Part Two

Last week I shared a Patriotic BOHO style wooden star...
You can find the link to that post HERE.

When I found this cute little table, I knew that I wanted to cover the drawers with Caravans, the same transfer from Re*design With Prima, that I used on the star. And, I had plenty left over from that project.
 I knew I might be facing a problem! The legs were wrapped in yarn at the bottom. Why would you do that? Are you trying to hide something?
 They were absolutely hiding something! I removed the yarn, only to find electrical tape...
 I removed the electrical tape, only to find double sided, thick tape. I removed that to find that some of the legs were badly damaged. I took the easy way out in fixing them by just cutting off the damaged part.
 I painted the table with the color Honky Tonk Red from the Dixie Belle Paint Company.
 I ran into another little problem.
The knobs on the drawers were glued on so I couldn't remove them to add the transfer. My daughter had the great idea to use a hole punch, then cut an X to make the hole fit over the knobs.
Once I had cut the transfer to the size of the drawer fronts, to find exactly where the holes should go, I painted the knobs with the color, Fluff, and while they were wet, I lined up the transfer with the drawer, & let the wet paint make a mark on the transfer. 
 The transfer went perfectly over the knobs!


 And, there's nothing to hide...
no yarn needed to cover something up!


Linking To:

Saturday, June 13, 2020

Red, White, And Boho Star

Here's a twist on the typical stars & stripes decor.
For something a little different I added a touch of Boho style.

I started with a wooden star cutout from Signopoly
The grooves make it easy to paint & add design.
I painted the entire star with the color, Fluff, from the Dixie Belle Paint Compnay. Then I painted every other stripe with the color Honky Tonk.
For the Boho detail, I used the Caravans decor transfer from Re*design With Prima. The transfer works best if the paint has had plenty of time to dry. So I waited overnight before adding the transfer.
I made a template, then cut the transfer to fit the remaining sections of the star.

I used the applicator tool that comes
with the transfer to rub the design onto the star.
I pressed the applicator tool down into the grooves to push the transfer into them so I wouldn't lose that detail.


To finish off the star and accentuate the grooves in the wood, I added wax. On the painted stripes, I first added clear wax. This makes the dark wax easy to manipulate and not be too hard to lighten on the matte finish of the paint. I didn't worry about the clear wax getting into the grooves because I wanted them to be dark. The area with the transfer didn't need it because it is a slick surface.
Then I added black wax down into the grooves in the wood, & also in the grooves of the transfer, & along the edges of the star, then wiped them back to smooth out the wax & give it a softer appearance.


Red, white, & Boho!

Linking To: